- 21 Jan 2025
- Print
- PDF
System Settings
- Updated on 21 Jan 2025
- Print
- PDF
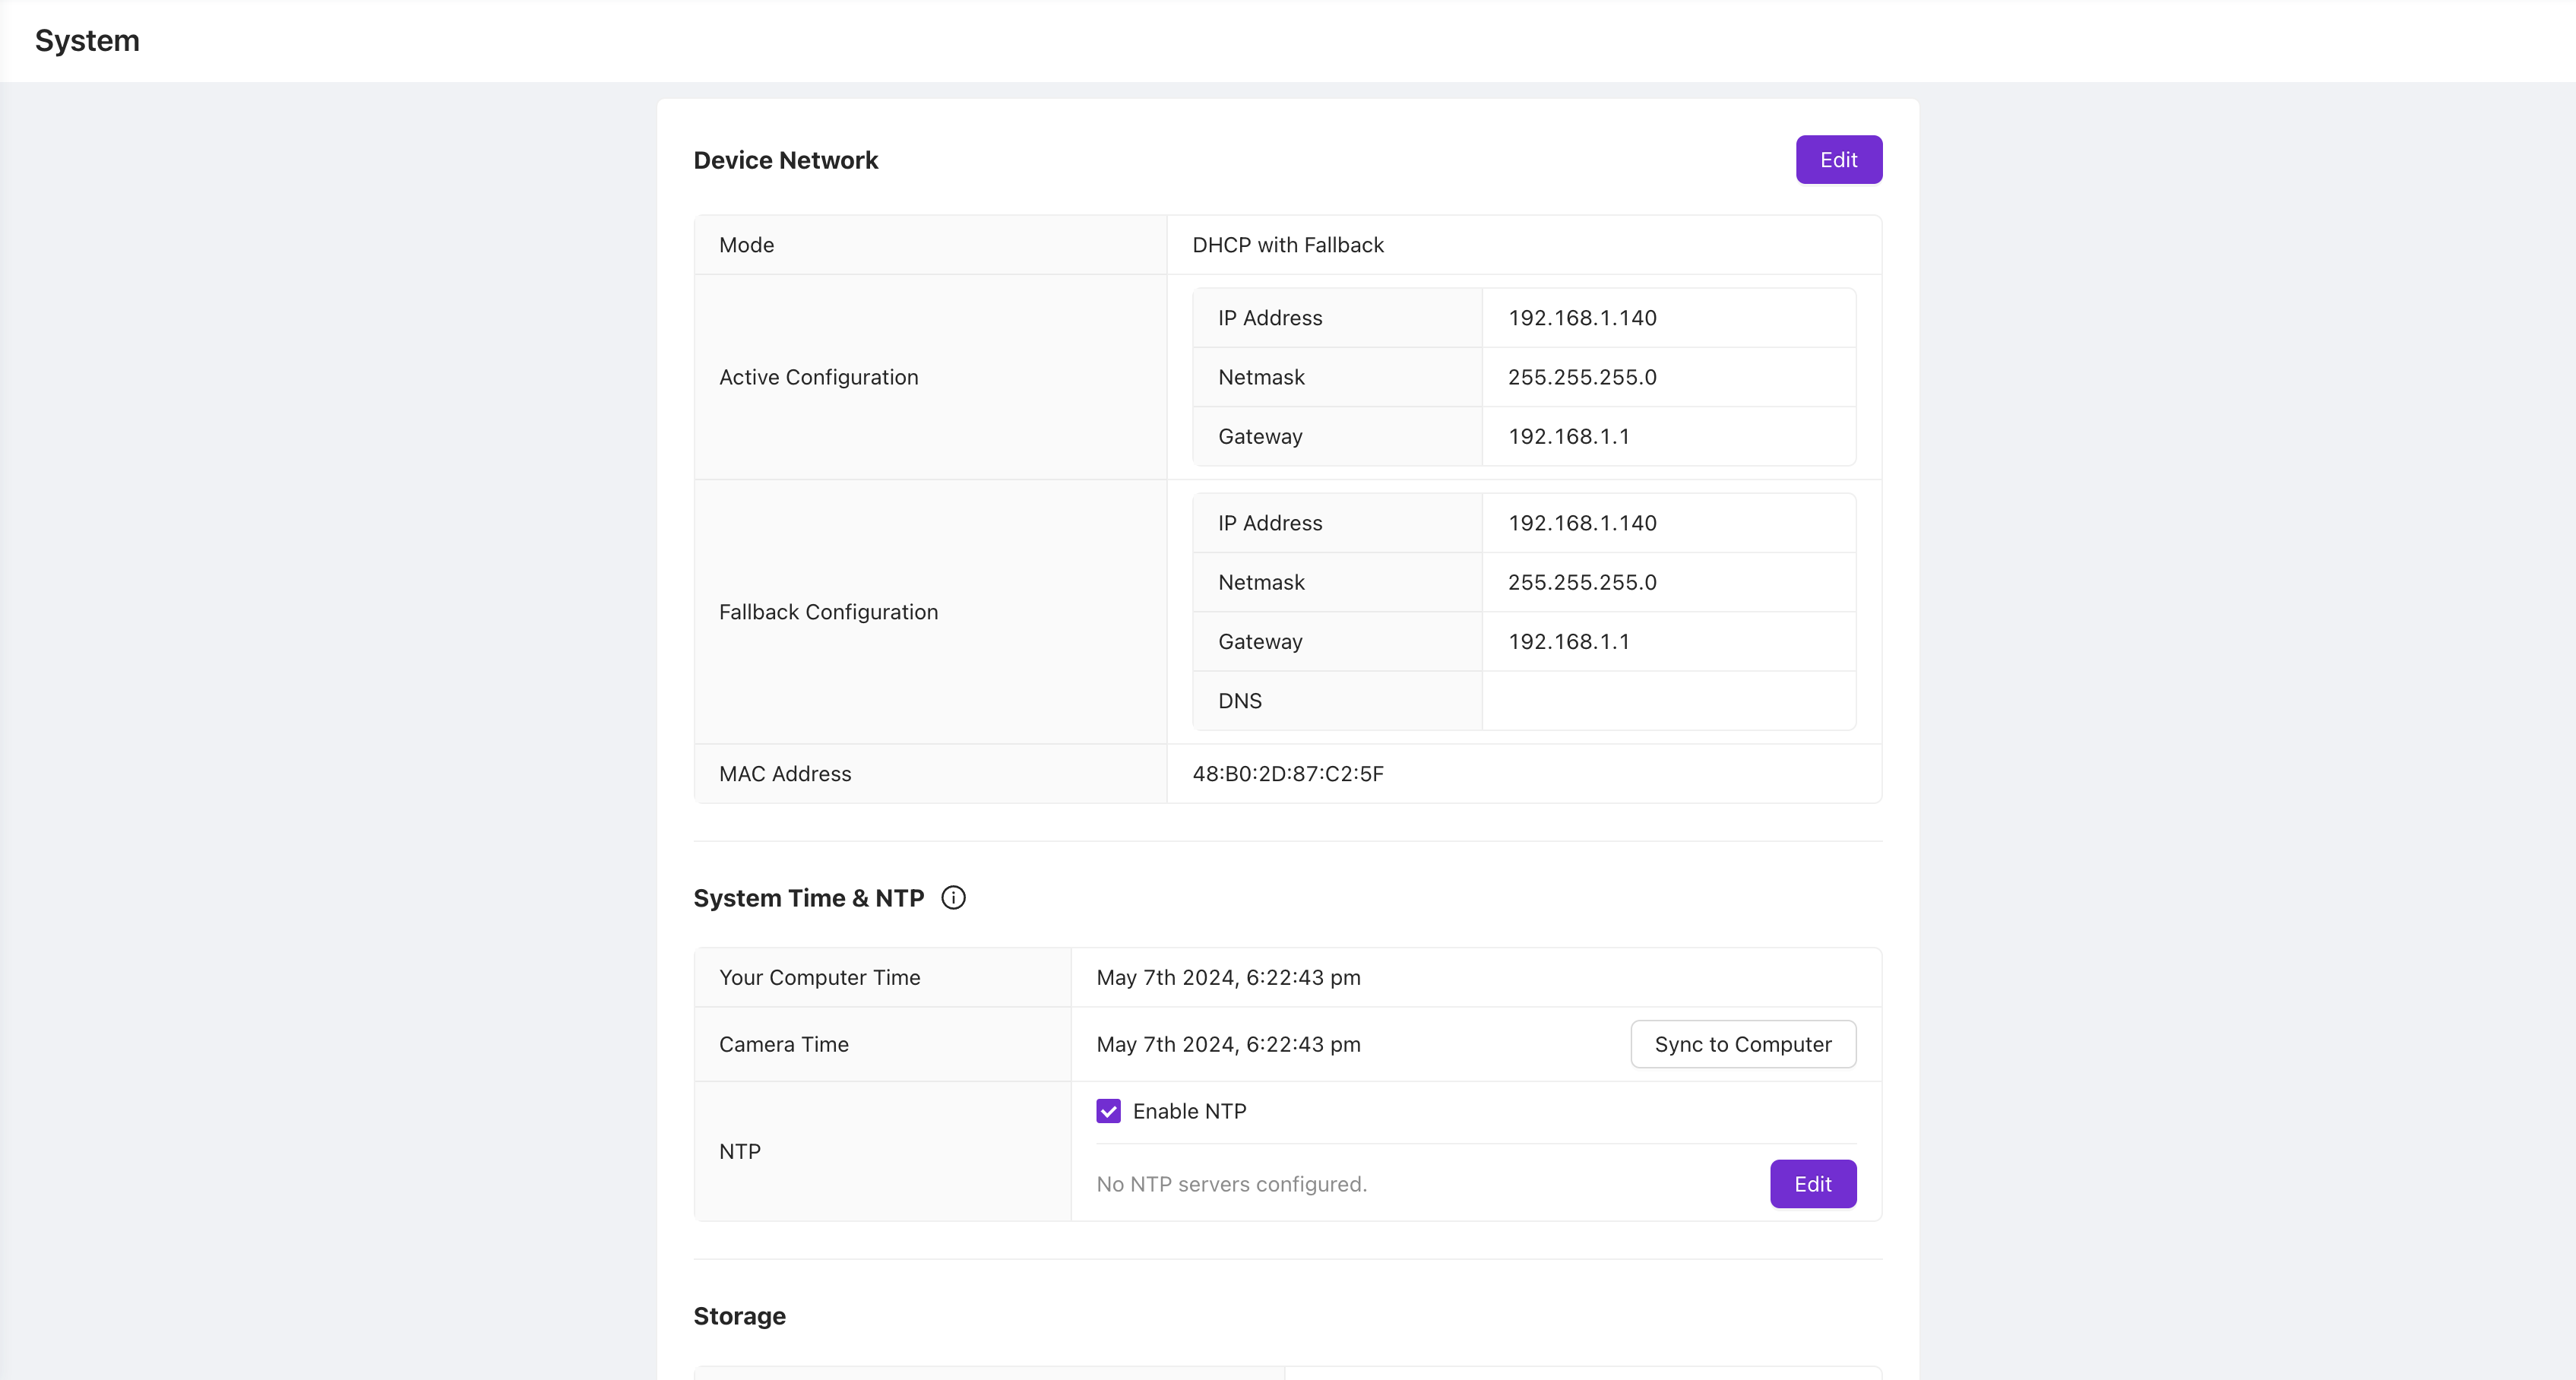
Navigate to System Settings to configure network settings and system time, view device storage, download system logs, or restart the camera remotely.
Device Network
When setting up your camera, it will typically look for DHCP settings on your network to automatically obtain an IP address. However, if it is unable to find a network in 90 seconds, it will set its fallback IP address as its default IP address. If you need to change the IP address of your camera, you can do so by accessing the Active configuration and fallback configuration settings. Once you have made the necessary changes, be sure to restart your camera to ensure that the new settings are applied. Keep in mind that the specific steps for changing the IP address may vary depending on the make and model of your camera, so refer to the manufacturer's instructions for more detailed guidance.

Other Settings
When you access the settings of your camera, you can easily find the day, date, and time information. You have the option to set it manually or let it synchronize with an NTP server or your computer's local time. This ensures that your camera's timestamp is accurate and up-to-date. In addition to that, you can also see the storage capacity of your camera. This lets you know how much space is available to store your recordings. You can also check the currently installed software version to see if you have the latest updates. In case you encounter any issues with your camera, you can get the logs from the settings section. The logs will be available for the last 6 hours and can be used to submit a bug report. You can also restart the camera from the same settings section if you need to troubleshoot any issues.
.png)
