- 22 Oct 2024
- Print
- PDF
Recipe Editor
- Updated on 22 Oct 2024
- Print
- PDF
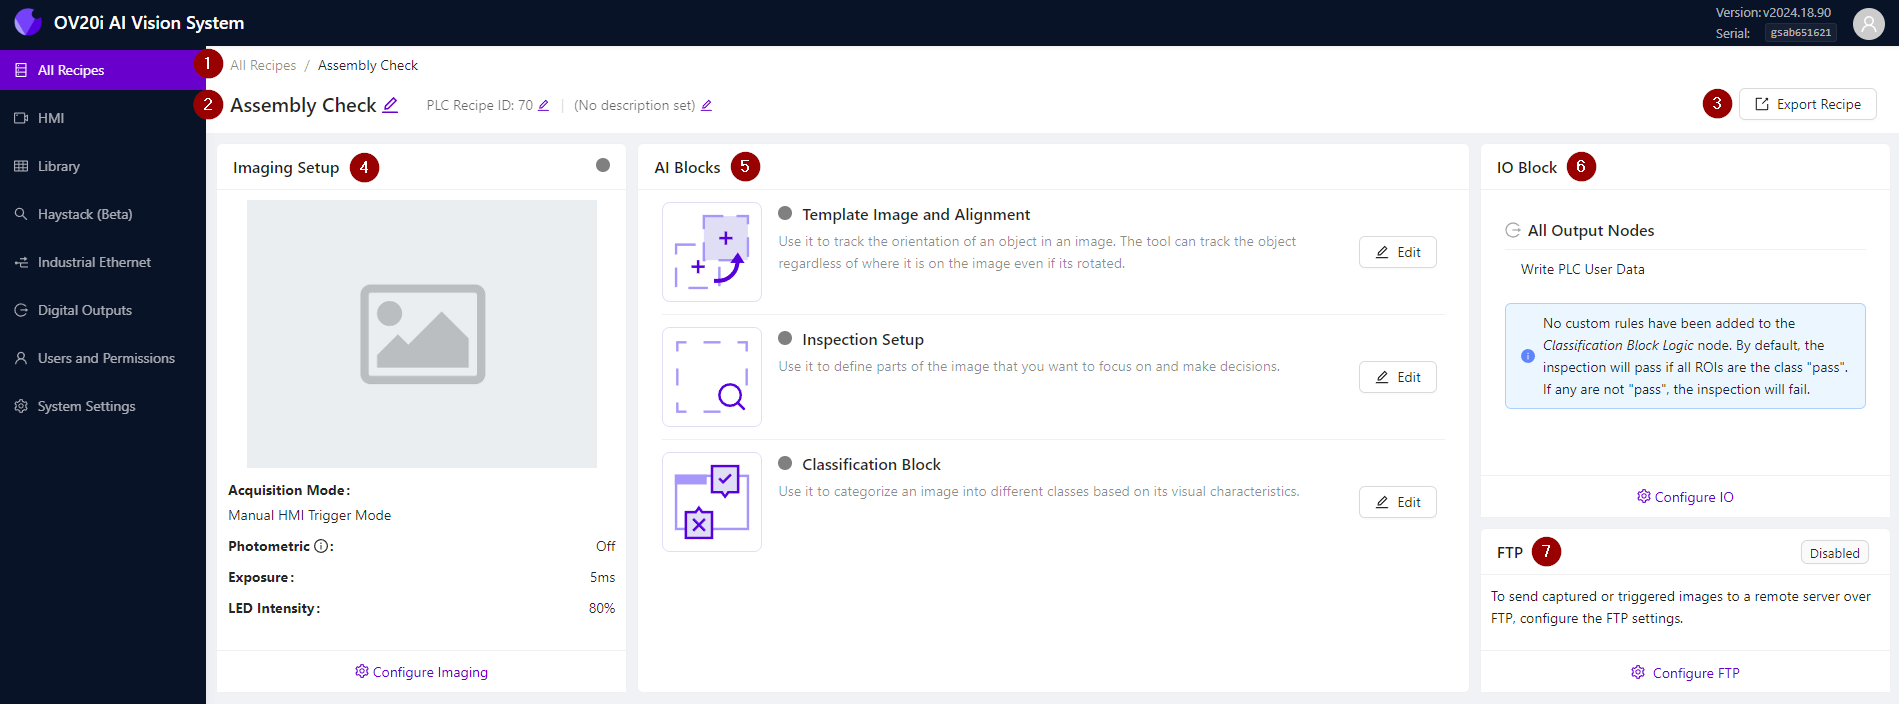
The Recipe Editor provides a simple workflow for users to change image capture settings, set up part alignment, define regions of interest (ROIs) for their inspection, collect and label model training data, configure process logic and IO behavior, and link the OV20i to an FTP server for data storage.
The recommended workflow for building a Recipe is:
Imaging Setup → Template Image and Alignment → Inspection Setup → Classification Block/Label And Train → IO Block

| Navigation Bar: Click on the Recipe name (i.e., “Assembly Check” in this example) to return to this page from any Recipe Editor sub-menu. |
| Recipe Name / PLC Recipe ID / Description: The Recipe information displayed here may be edited by clicking on the ✏️ Edit button to the right of each field. |
| Export Recipe: Click here to export a copy of the active Recipe to your computer. You can choose to export with or without library captures associated with the Recipe—training images will be included in all instances. |
| Imaging Setup: Adjust focus, exposure, gain, and lighting settings to obtain the best image quality for inspection, and select from different trigger options to suit your use case. |
| AI Blocks: Define your deep learning inspection task using intuitive configurators organized into 3 modules:
|
| IO Block: Define Pass/Fail rules for each captured image, and use a built-in Node-RED editor to customize digital IO functions, complex logic, and web-based dashboards and user interfaces. |
| FTP: Send captured images to a remote server using the File Transfer Protocol (FTP). |


