Mounting and Lens Selection
- 26 Jun 2025
- Print
- PDF
Mounting and Lens Selection
- Updated on 26 Jun 2025
- Print
- PDF
Article summary
Did you find this summary helpful?
Thank you for your feedback!
Use the resources below to mount the OV20i using the mounting plate at the correct distance and select the lens size for your application.
Note
It’s normal for the OV20i to become hot to touch when powered. For high temperature environments, use the front mounting points.
Note
Here are some specs to keep in mind when mounting:
Resolution: The OV20i's resolution is 1.6MP (1440x1080)
Weight: The OV20i weighs 700g (~1.5lbs)
Hardware Resources
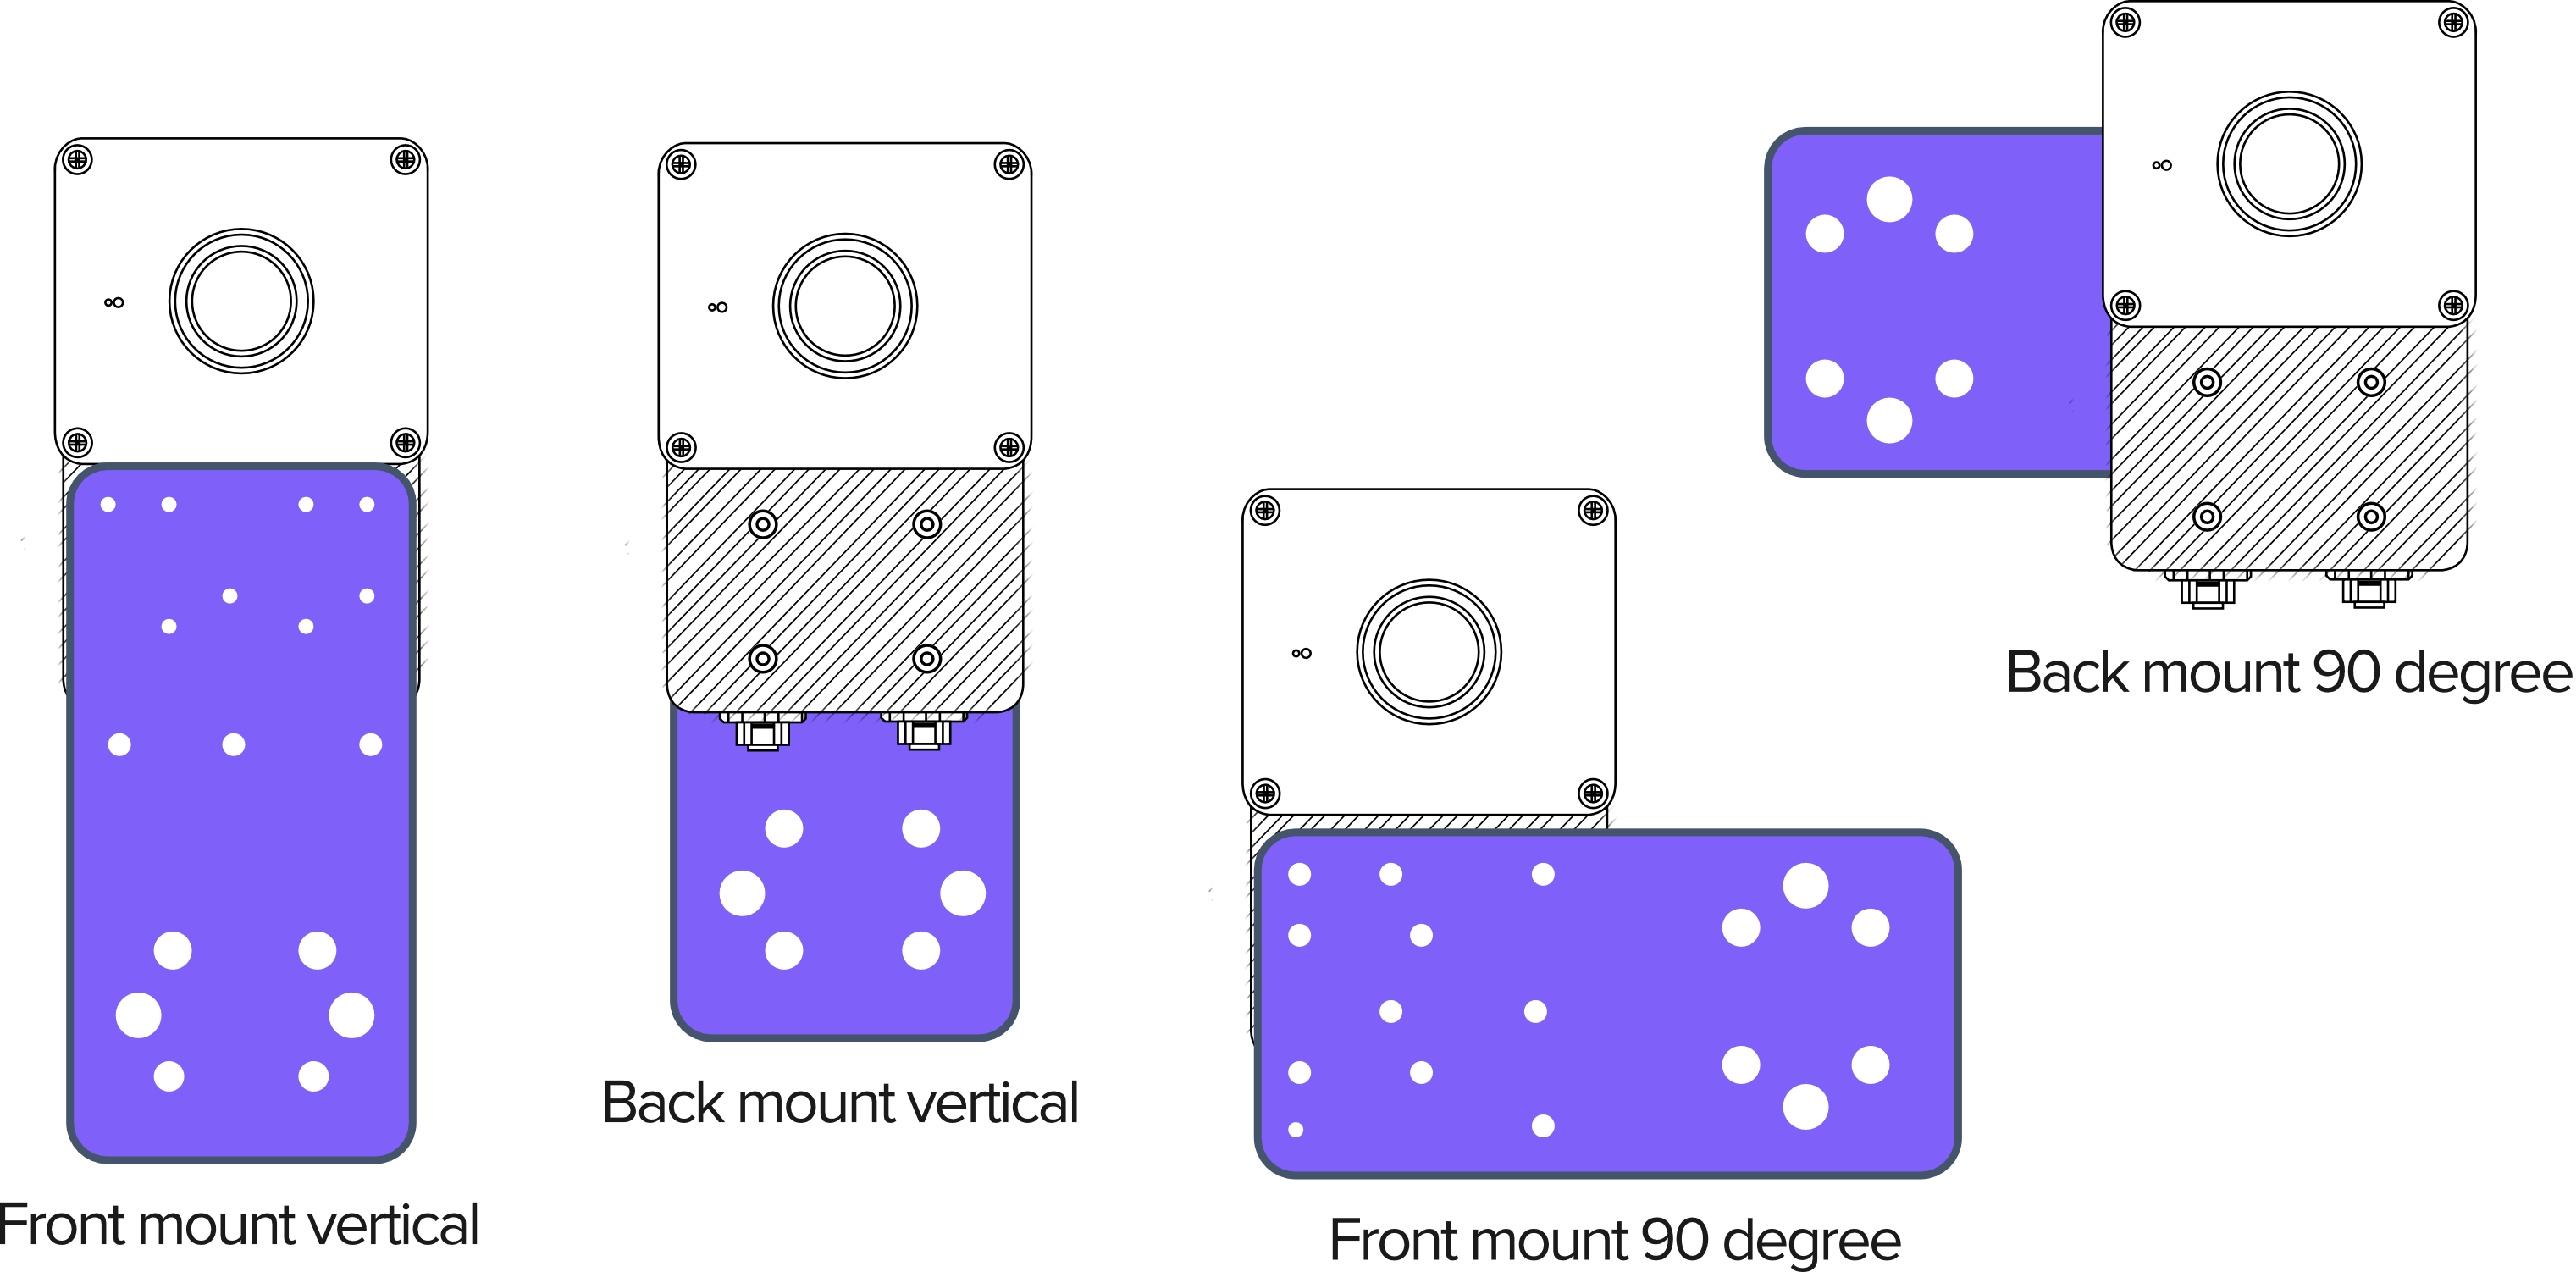
OV20i Mounting Arrangements
OV20i 2D Drawing
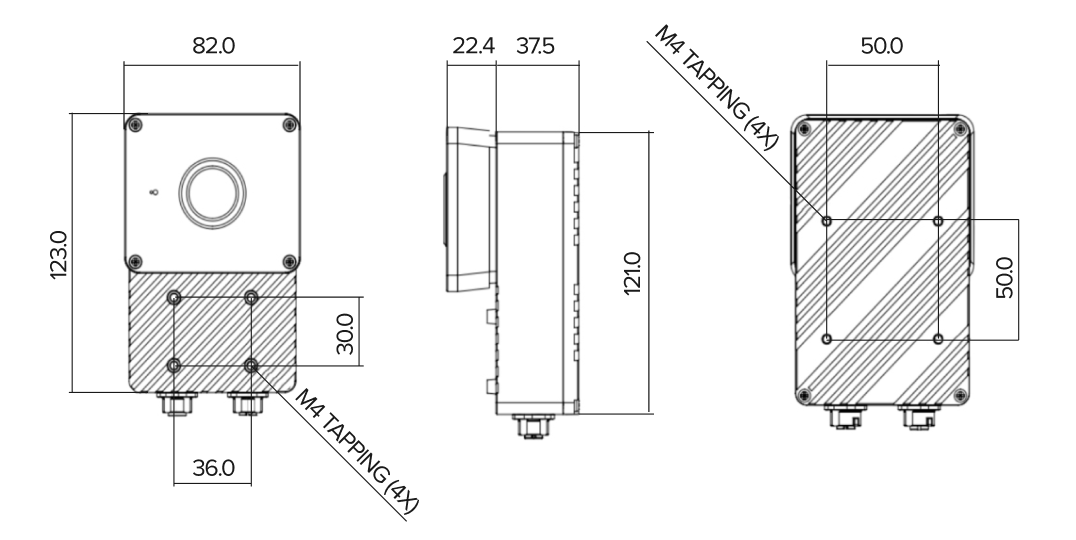
Mounting Plate 2D Drawing
.png)
OV20i 3D Model
Calculating the Mounting Distance and Lens Size
The Field of View (FoV) is determined by the lens size and the working distance. Refer to the chart below or our calculator for guidance.
Note
The OV20i is fitted with a 12mm lens as standard. Other lenses are sold separately.
Working distance is measured from the front surface of the lens to the subject part.
Field of View (FoV) Widths at 100mm, 1m, and 2m mounting distances
Note
The camera has a 4:3 aspect ratio. The dimensions provided below refer to the width of the FoV. Multiply the width by 0.75 to calculate the height at the same distance.
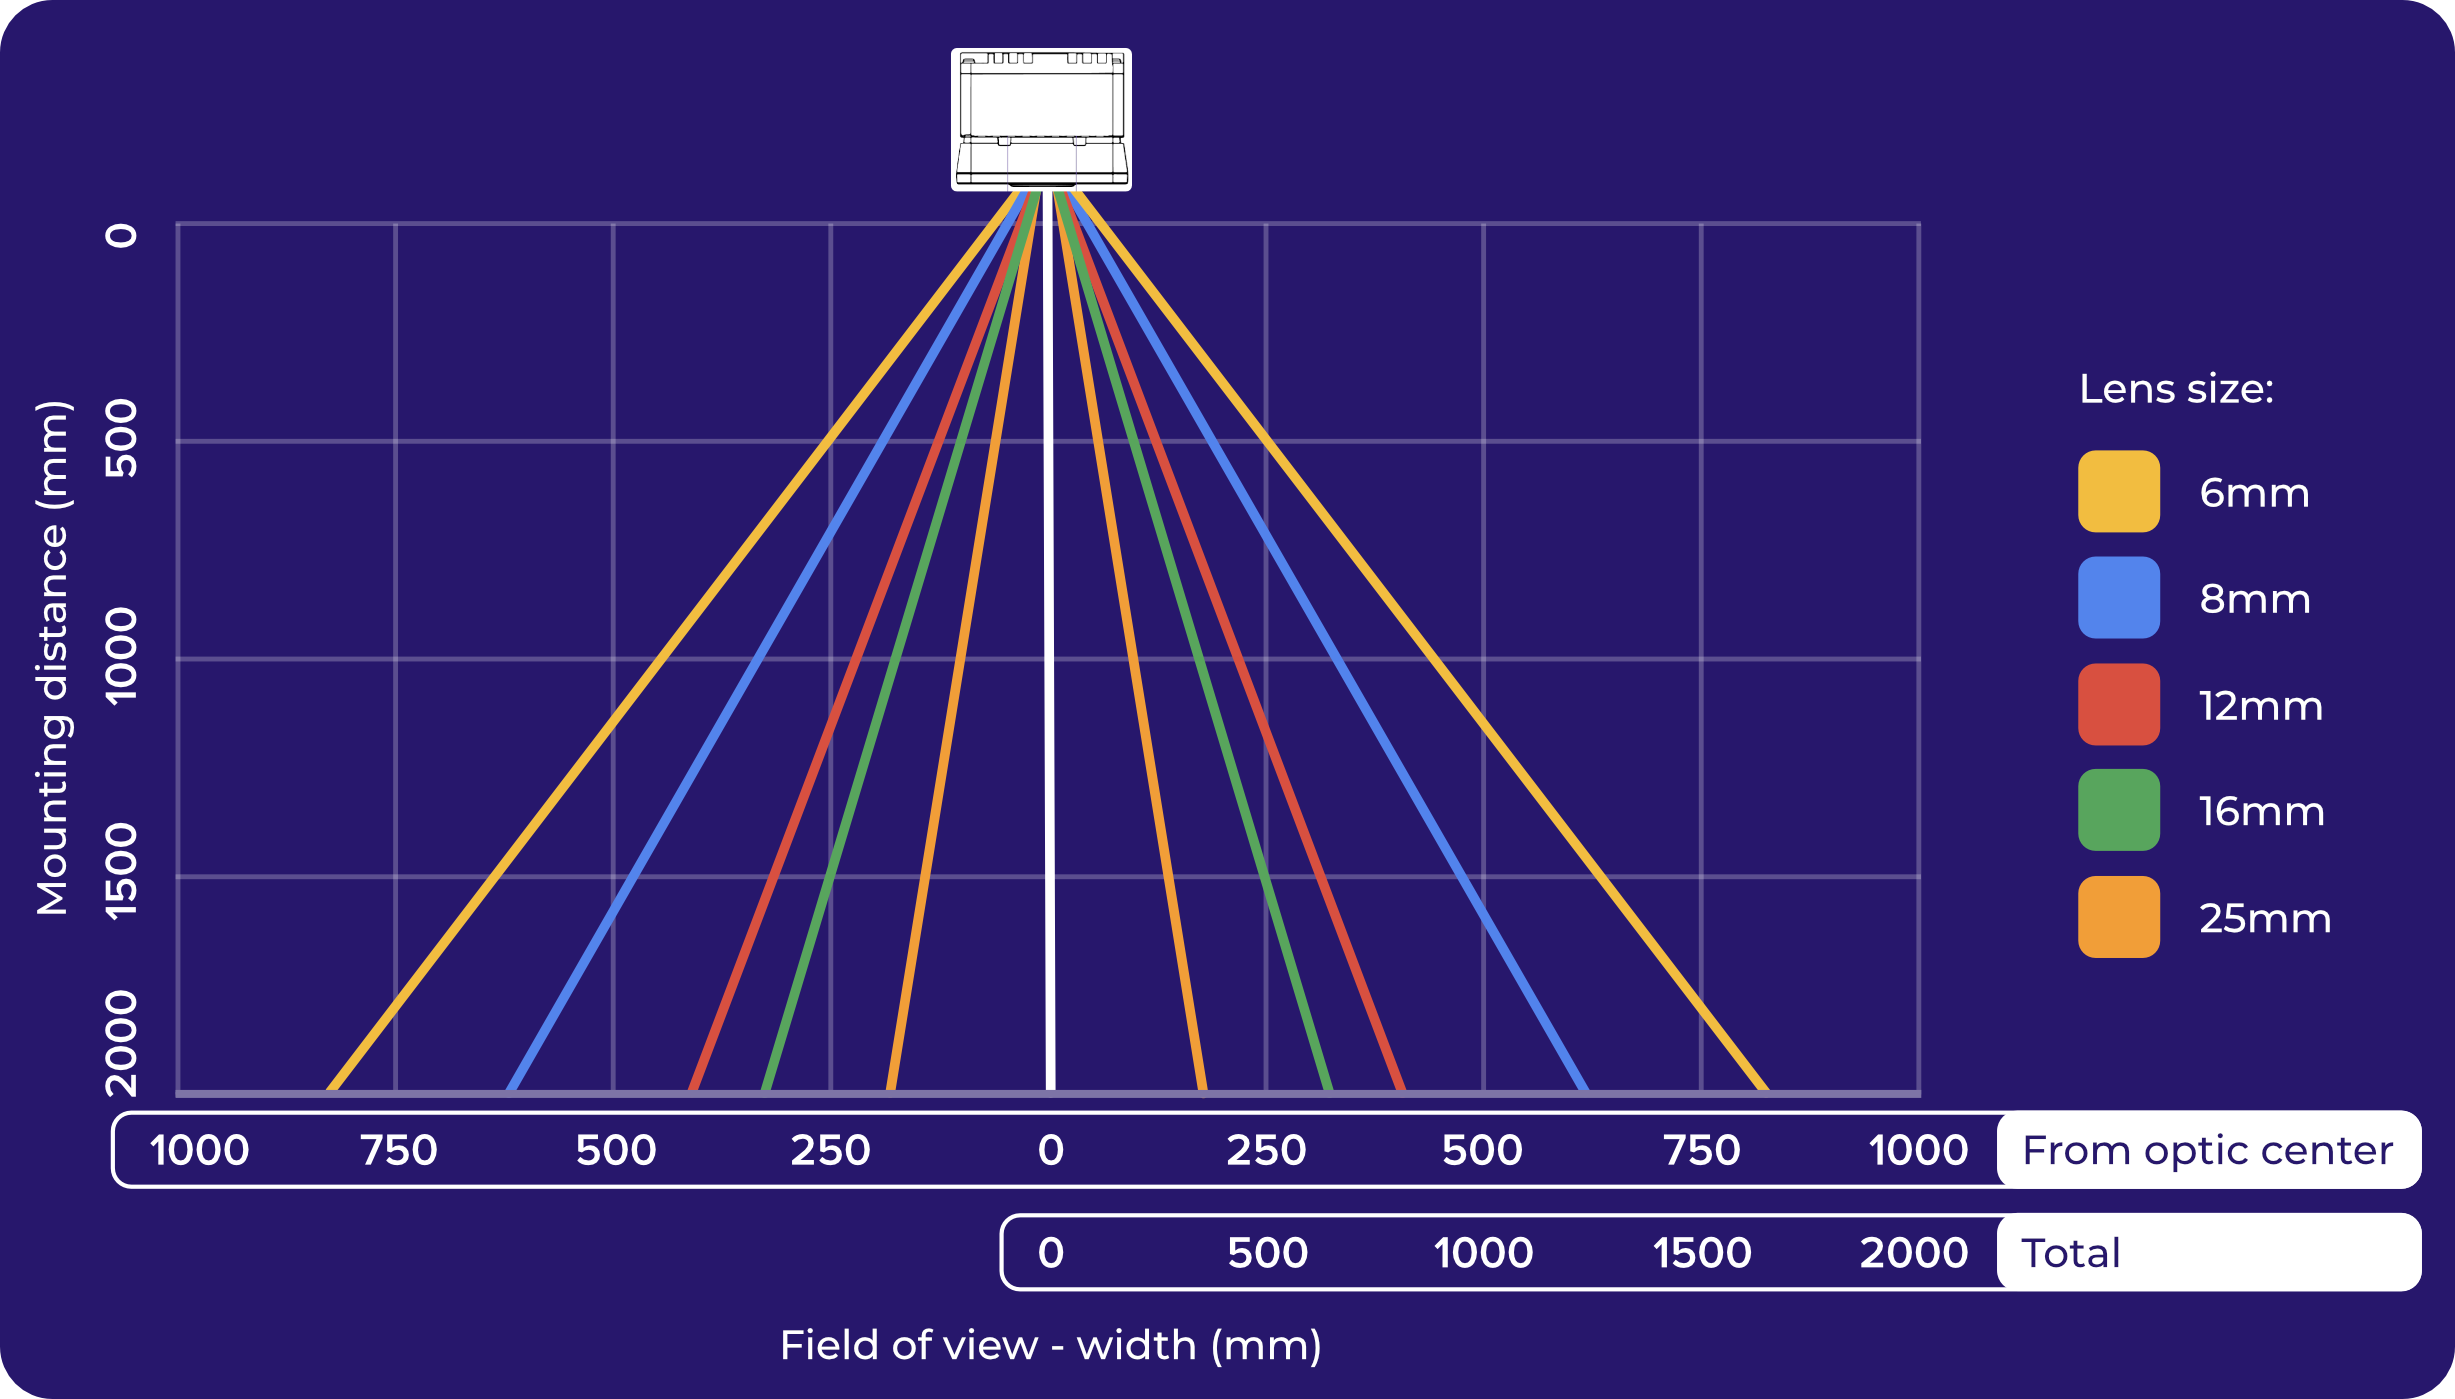
Lens Focal Length | FoV at 100mm Working Distance | FoV at 1m Working Distance | FoV at 2m Working Distance |
|---|---|---|---|
6mm | 83mm | 825mm | 1650mm |
8mm | 62mm | 619mm | 1238mm |
12mm (default) | 40mm | 405mm | 810mm |
16mm | 34mm | 340mm | 680mm |
25mm | 20mm | 198mm | 396mm |
Swapping the Lens
The OV20i is fitted with a 12mm lens as standard. If you’ve purchased another size, follow the steps below to change the lens:
Use a Phillips-head screwdriver to remove the 4 screws at the corners of the OV20i faceplate.
Remove the faceplate, exposing the LED board and lens.
Unscrew the 12mm lens counterclockwise and remove it from the camera.
6-16mm Lenses (expand for instructions)
Apply Loctite to the lens thread.
Insert the replacement lens and firmly hand-tighten it (clockwise).
Caution
To avoid over-tightening, do not use tools. Hand-tighten only.
25mm Lens (expand for instructions)
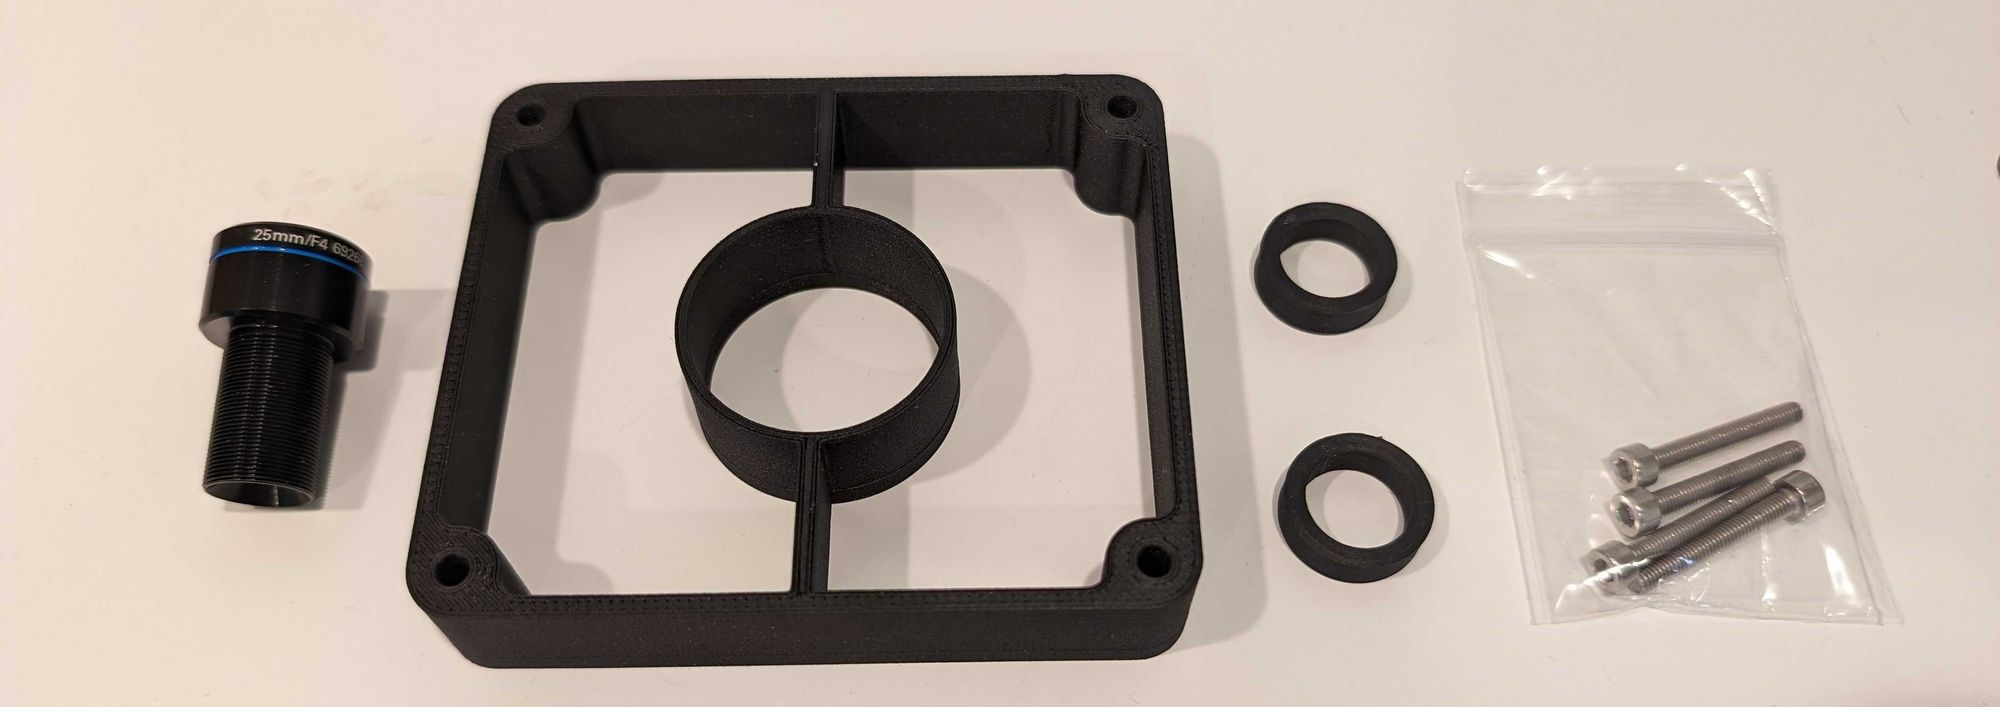
An additional kit is provided for the 25mm lens:
1x M12 f/4 25mm lens
1x 15mm faceplate spacer
2x 5mm spacer rings
4x M3x22 socket head cap screws
Install the 2x 5mm spacer rings onto the thread of the lens.
.png)
Apply Loctite to the bottom section of the lens thread.
Insert the lens with spacer rings onto the camera and firmly hand-tighten it (clockwise).
Caution
To avoid over-tightening, do not use tools. Hand-tighten only.
Install the 15mm faceplate spacer onto the camera and secure using the 4x M3x22 screws.
.png)
Replace the faceplate and screws.
Was this article helpful?