- 26 Nov 2024
- Imprimir
- DF
Guia rapida
- Actualizado el 26 Nov 2024
- Imprimir
- DF
Qué incluye
| Cámara OV20i |
| Placa de montaje y herrajes |
| Cable de alimentación E/S y bloque de terminales |
| Cable Ethernet |
También necesitarás
| Fuente de alimentación |
| PC y navegador (Chrome o Edge) |
Montaje y selección de lentes
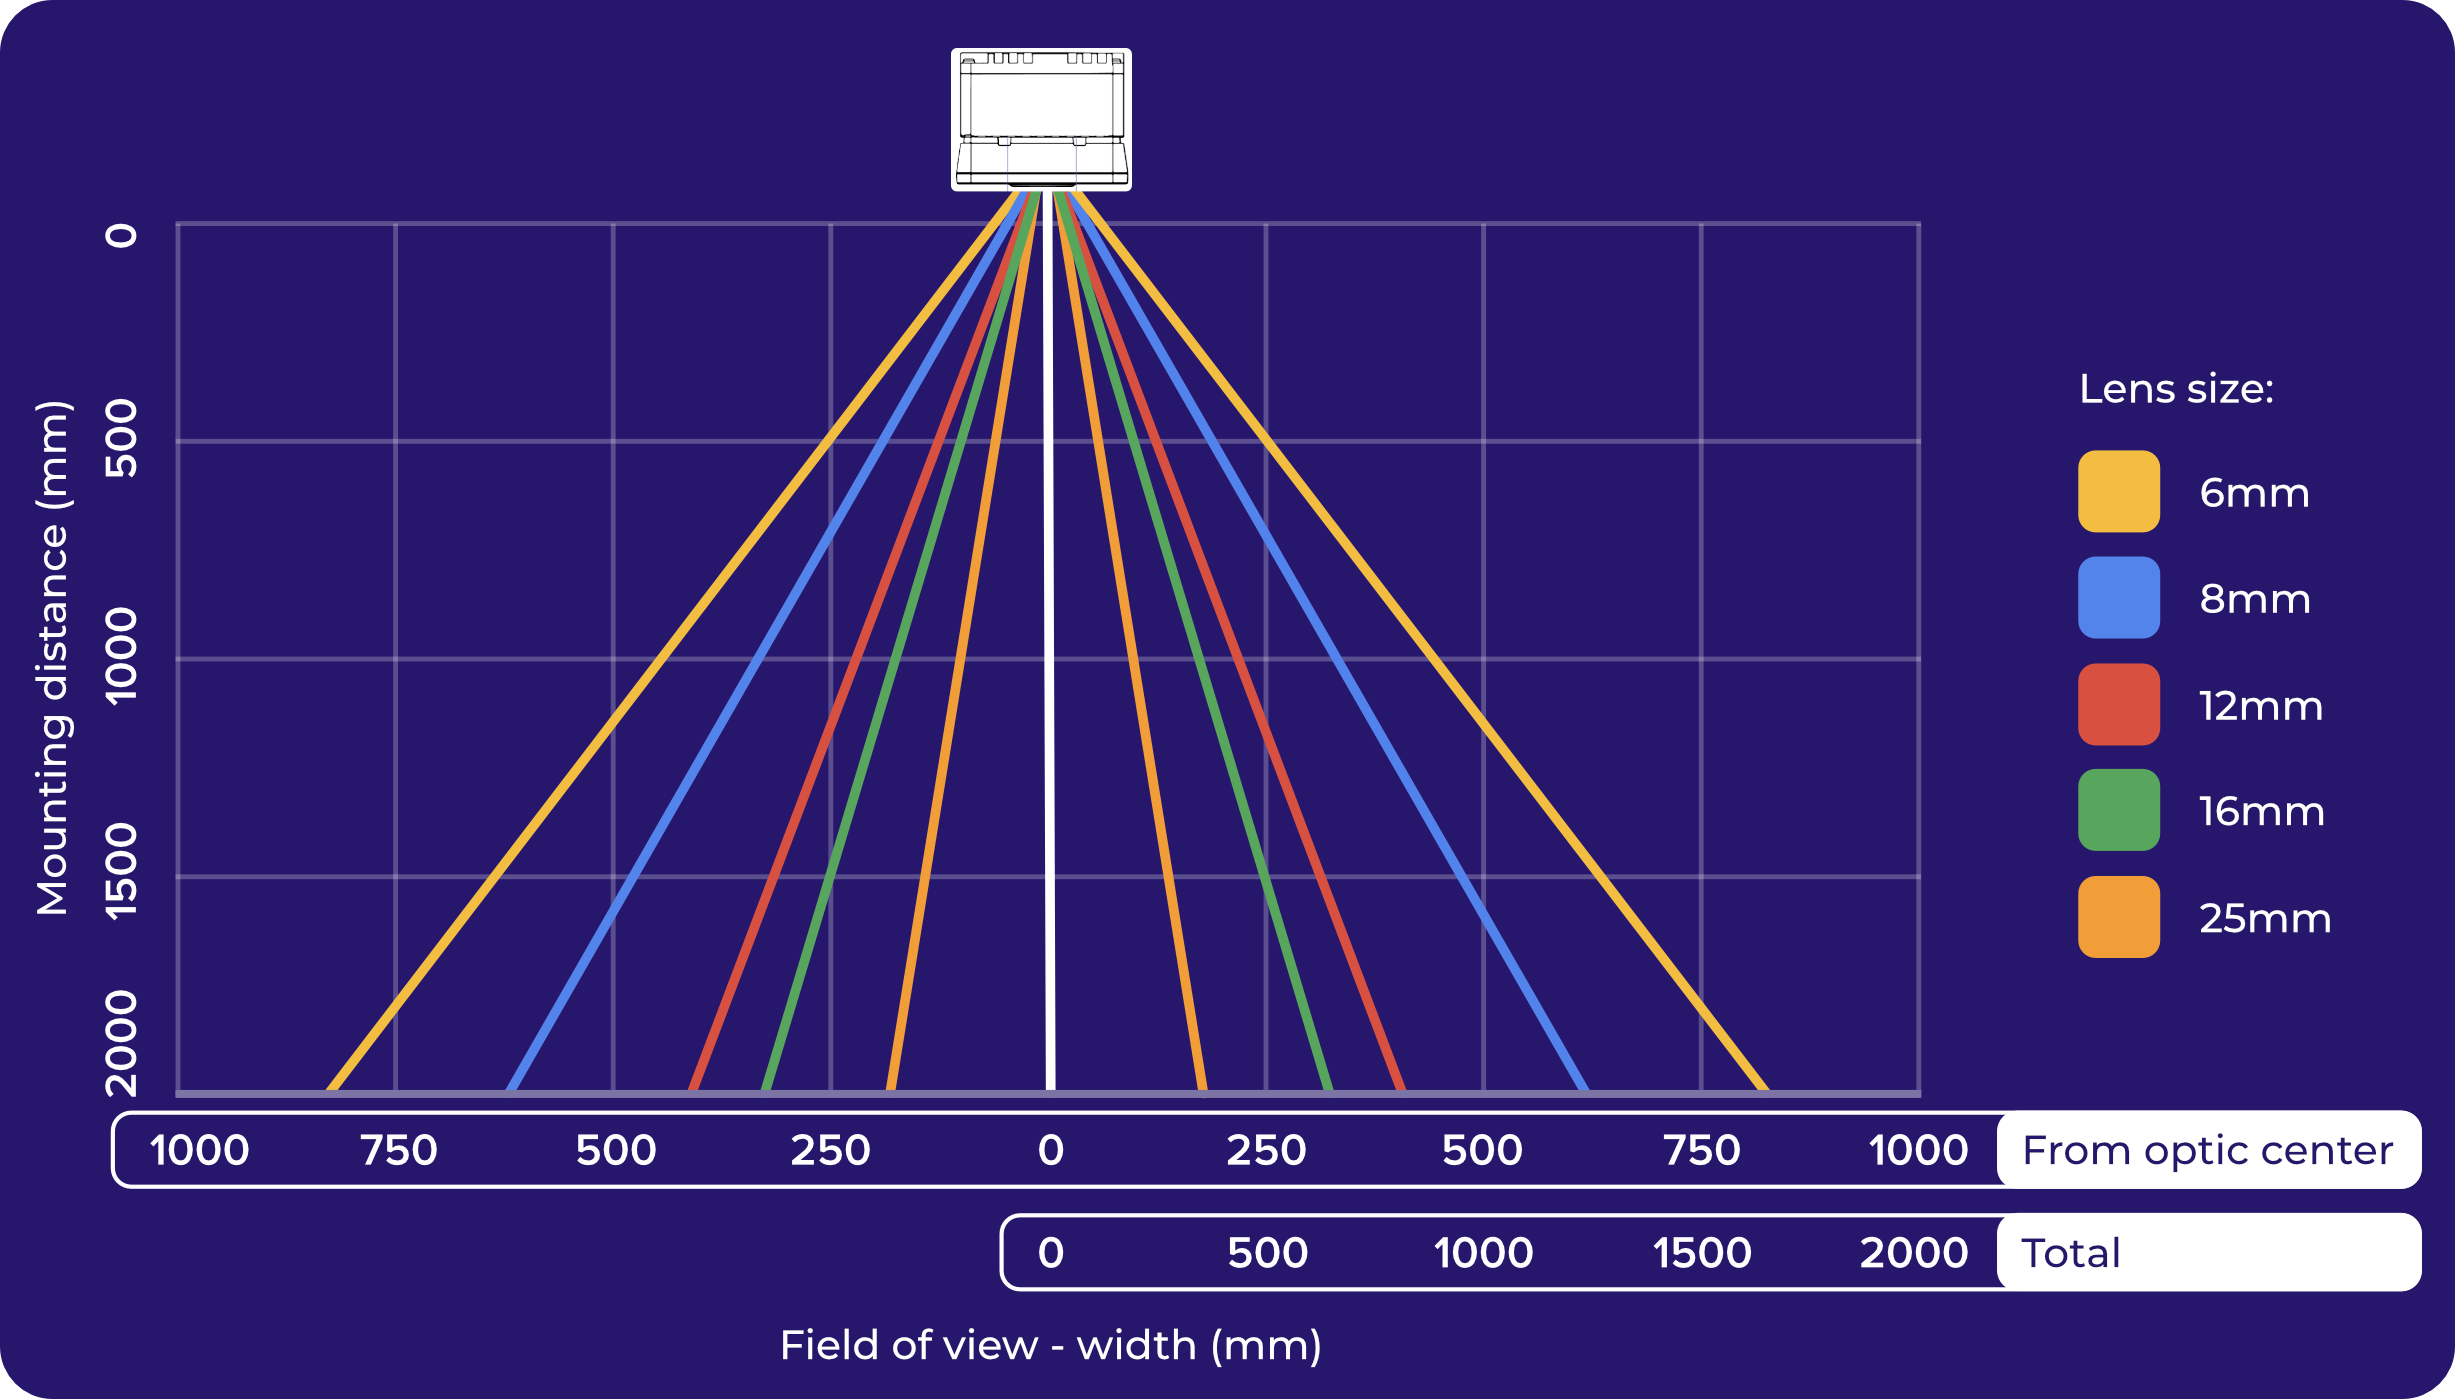
Visita overview.ai/calculator-for-ov20i o utiliza la siguiente tabla para calcular la altura de montaje necesaria para tu campo de visión (FoV). La OV20i está equipada con una lente de 12 mm. Otras lentes se venden por separado (ver Accesorios recomendados e Intercambio de lentes).

Nota
La cámara tiene una relación de aspecto 4:3. Multiplique la anchura por 0,75 para calcular la altura.
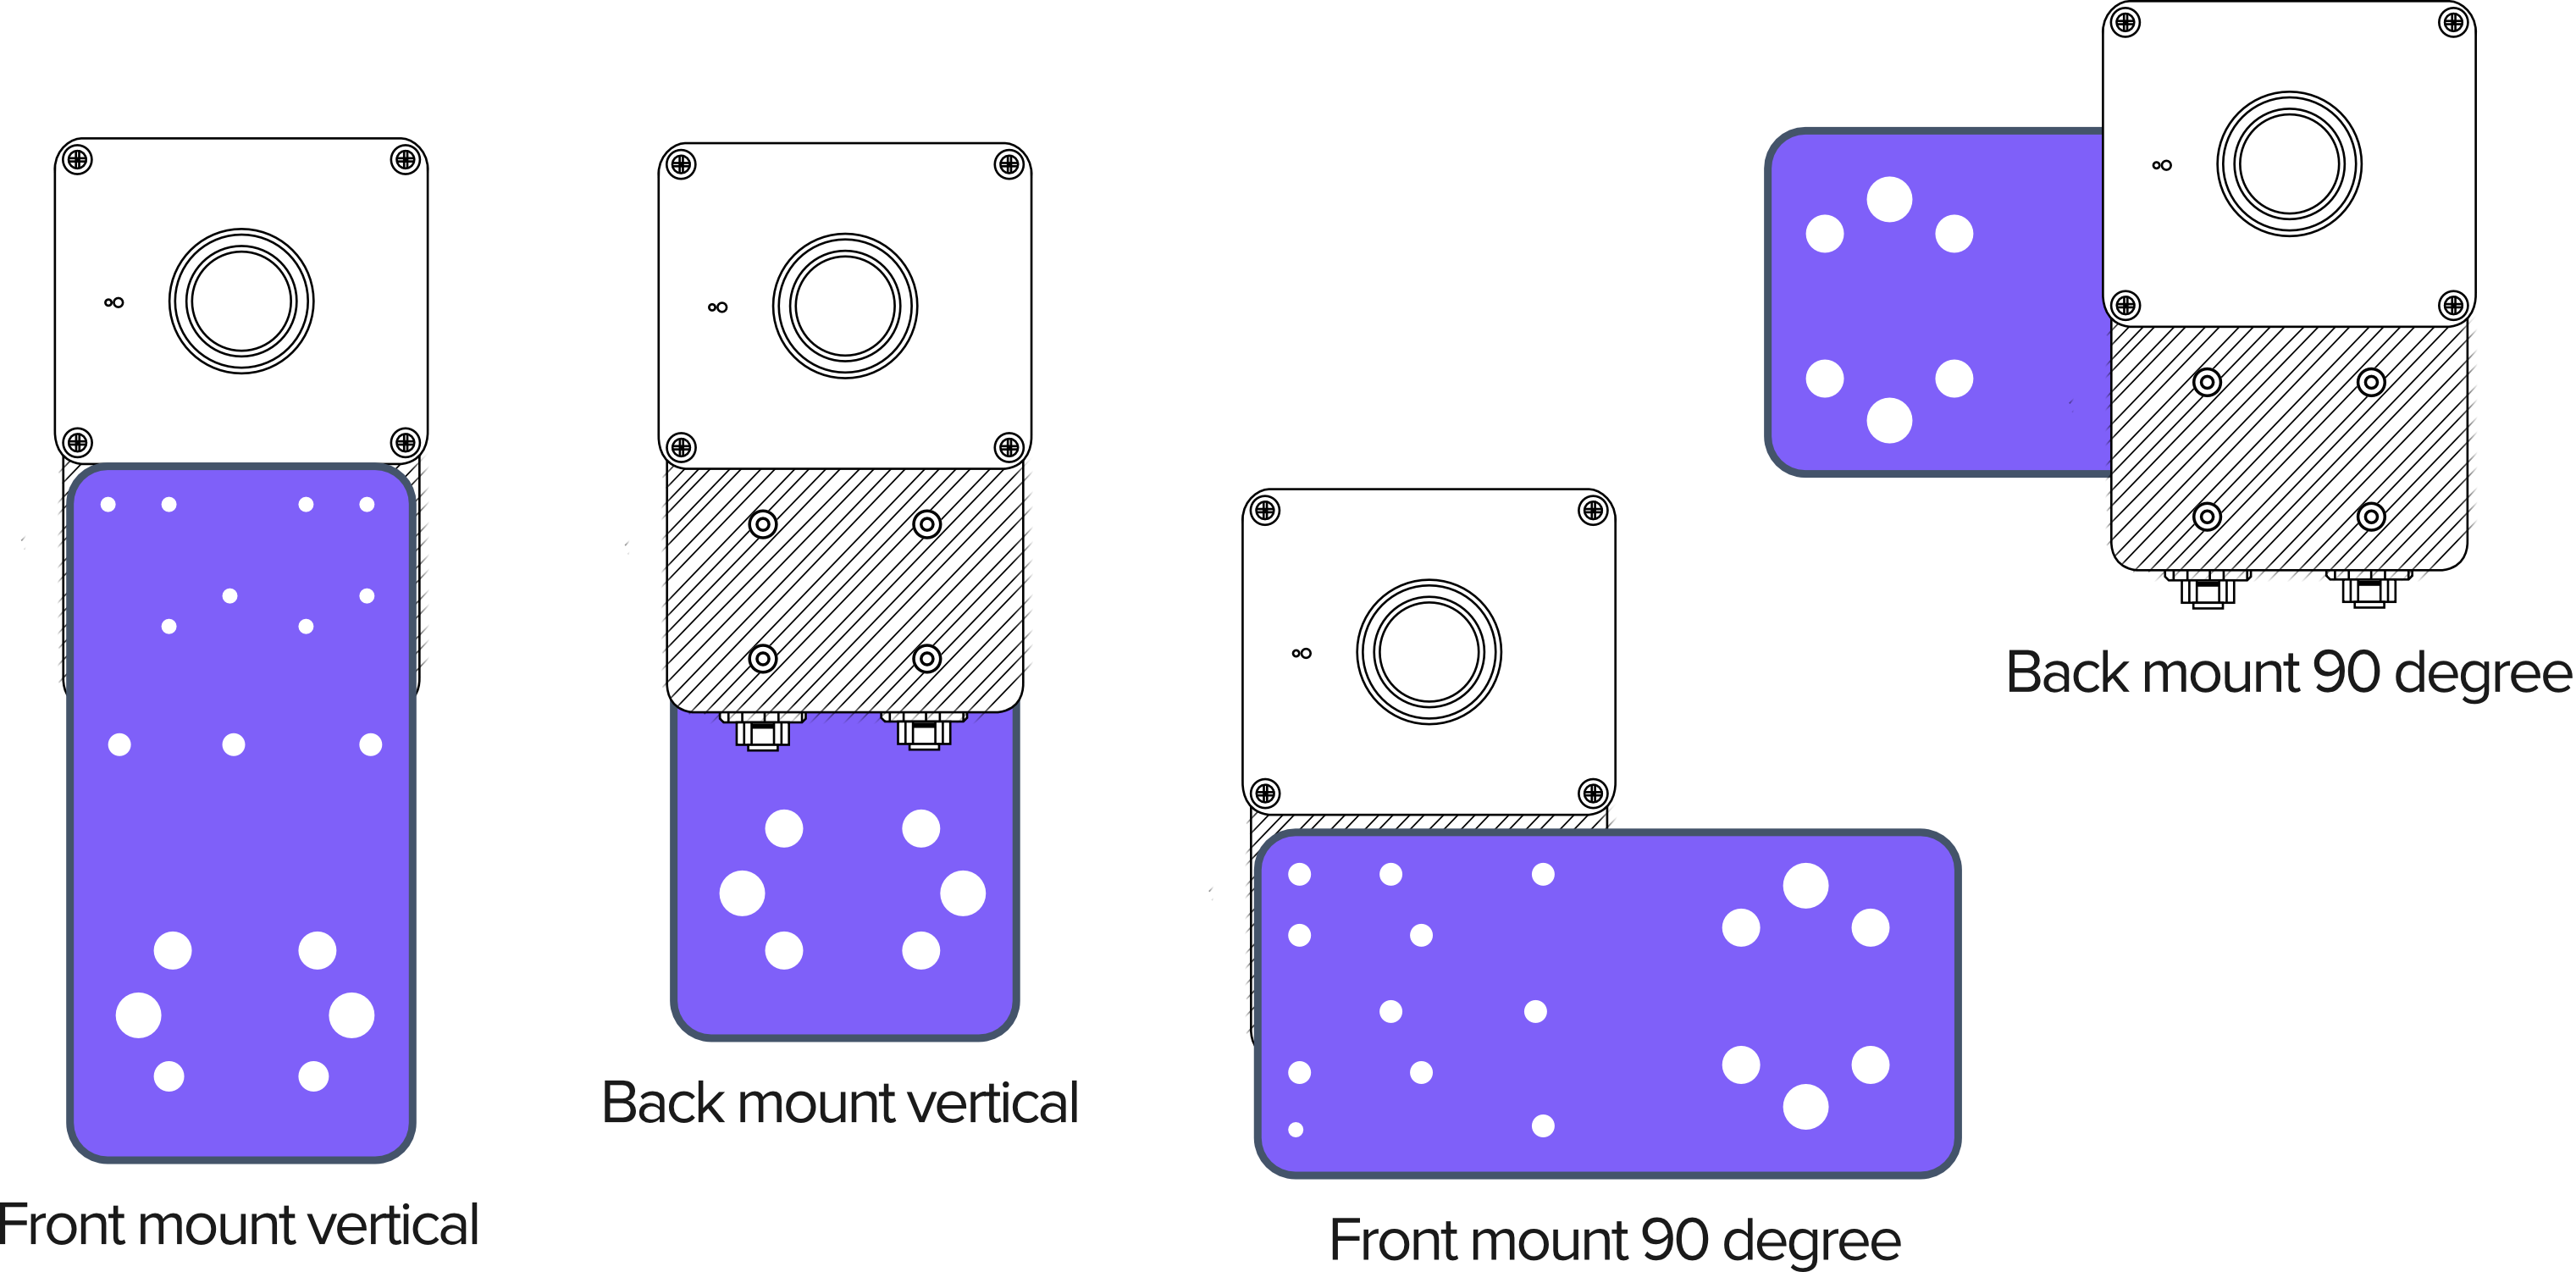
Monte la cámara utilizando la placa y los herrajes suministrados.

Nota
Es normal que la OV20i se caliente al tacto cuando está encendida. Para entornos con altas temperaturas, utilice los puntos de montaje frontales.
Conexión
Conecta el cable de alimentación I/O a la cámara y a una fuente de alimentación.

Conecte un ordenador a la cámara mediante:
Micro USB
Conecte un cable micro USB en el lateral de la cámara. Abra el navegador y vaya a 192.168.55.1.
Ethernet
Conecte el cable Ethernet a la cámara. Configure su adaptador Ethernet a la dirección IP 192.168.0.10 (máscara de subred 255.255.255.0) y, a continuación, abra su navegador web y vaya a 192.168.0.100.
Nota
Si te conectas con Google Chrome en un Mac, es posible que aparezca un error: «No se puede acceder a este sitio» (ERR_ADDRESS_UNREACHABLE). Tendrás que ir a Configuración del sistema MAC OS > Privacidad y seguridad. A continuación, desplázate hasta encontrar Red local. Asegúrate de que está activada para Google Chrome.
Para obtener más ayuda sobre cómo conectarse a la cámara, consulte Connecting to the OV20i Software.
Nota
Una vez conectado, tendrás que activar tu producto.


