- 09 May 2025
- Print
- PDF
Creating Your First Segmentation Recipe
- Updated on 09 May 2025
- Print
- PDF
Once you’ve followed the steps in Creating Your First Recipe to configure the Imaging Setup, Template Image and Alignment, and Inspection Setup, follow the steps below to train a Segmentation model.
Label and Train
In this section, you’ll capture several images of the object, label defects using the brush tool, and train the model. You’ll need to capture and label at least 10 images.
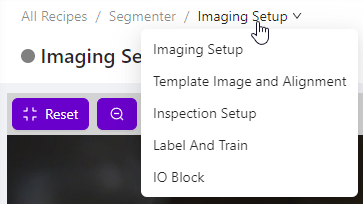
From the Inspection Setup page, use the breadcrumb menu to select Label and Train. Alternatively, select Label and Train from the Recipe Editor.

Note
The preview pane (on the left-hand side) displays a live preview, until an image is captured or is selected using the Navigation menu.
Under Inspection Types, click Edit to rename the default class (fail_[Inspection Type Name]) or add additional classes. Once you have all the classes you need the camera to identify, continue to the next step.
With the object in the camera’s field of vision, select Capture.
Use the Brush tool to highlight the defects on the object you want the camera to identify.
Tip
Use the Eraser tool to remove any unwanted highlights.
If you’ve added other classes, select the applicable Brush Class from the drop-down menu.
Click Save Annotations.
.png)
Place another example of the same object in the camera’s field of vision and repeat steps 3-6 until you have added at least 10 labeled examples (or if you’ve added additional classes, at least five examples of each class).
Tip
The model will be more accurate if each image is different (do not repeat the same image).
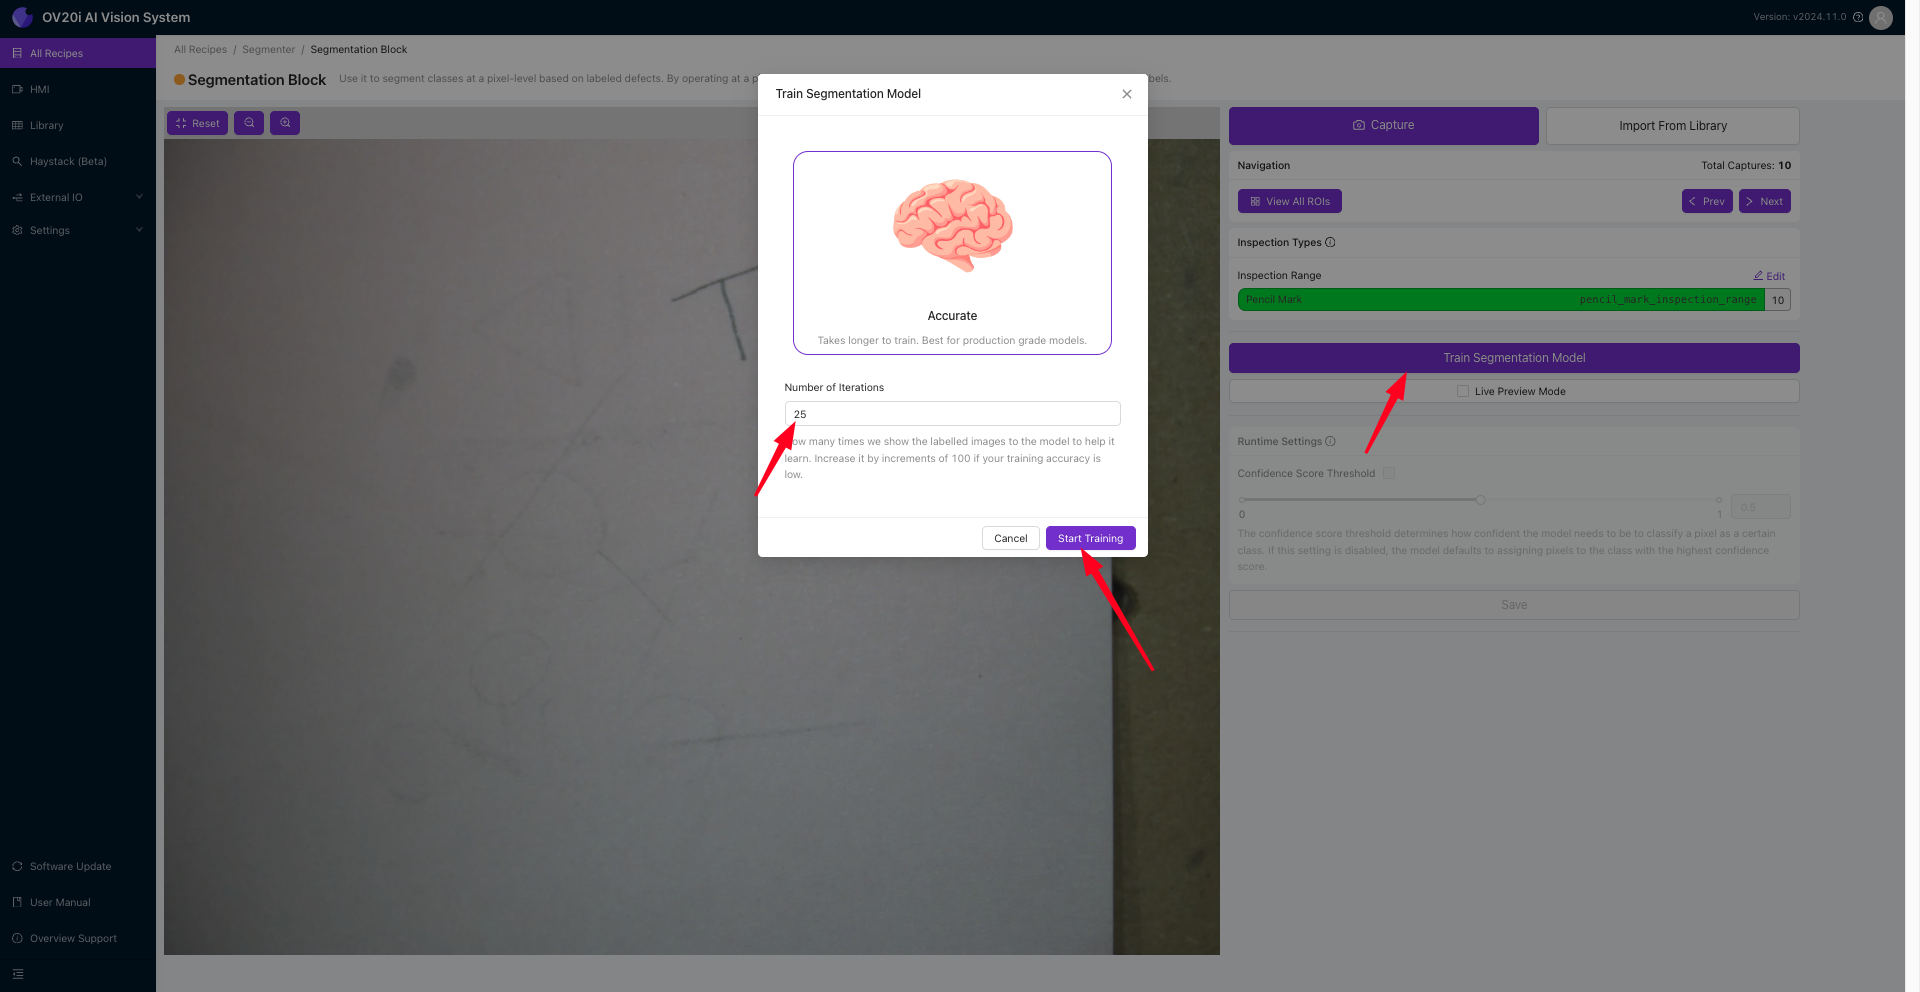
Double check that each capture is labeled correctly as this is what will be used to train the model.Click Train Segmentation Model.
Adjust the Number of Iterations using the arrows on the right-hand side of the field to set how many times the labeled images are shown to the model to help it learn.
Note
Increasing the number of iterations will improve the model’s accuracy, but will also take longer to train.

Click Start Training. A modal will display the progress of the training.
Once the model is trained, use the Live Preview Mode or the HMI tab to verify the functionality of your Recipe. Place different examples of the object in the camera’s field of vision and verify the model classifies each example correctly.
Note
For more information about the Label and Train page, see Label And Train (Segmentation).
To define the pass/fail logic for your Recipe, go to IO Block.
IO Block
In this section, you’ll define the pass/fail logic for your Recipe using Node-RED logic.
From the Label and Train page, use the breadcrumb menu to select IO Block. Alternatively, select Configure IO from the Recipe Editor.

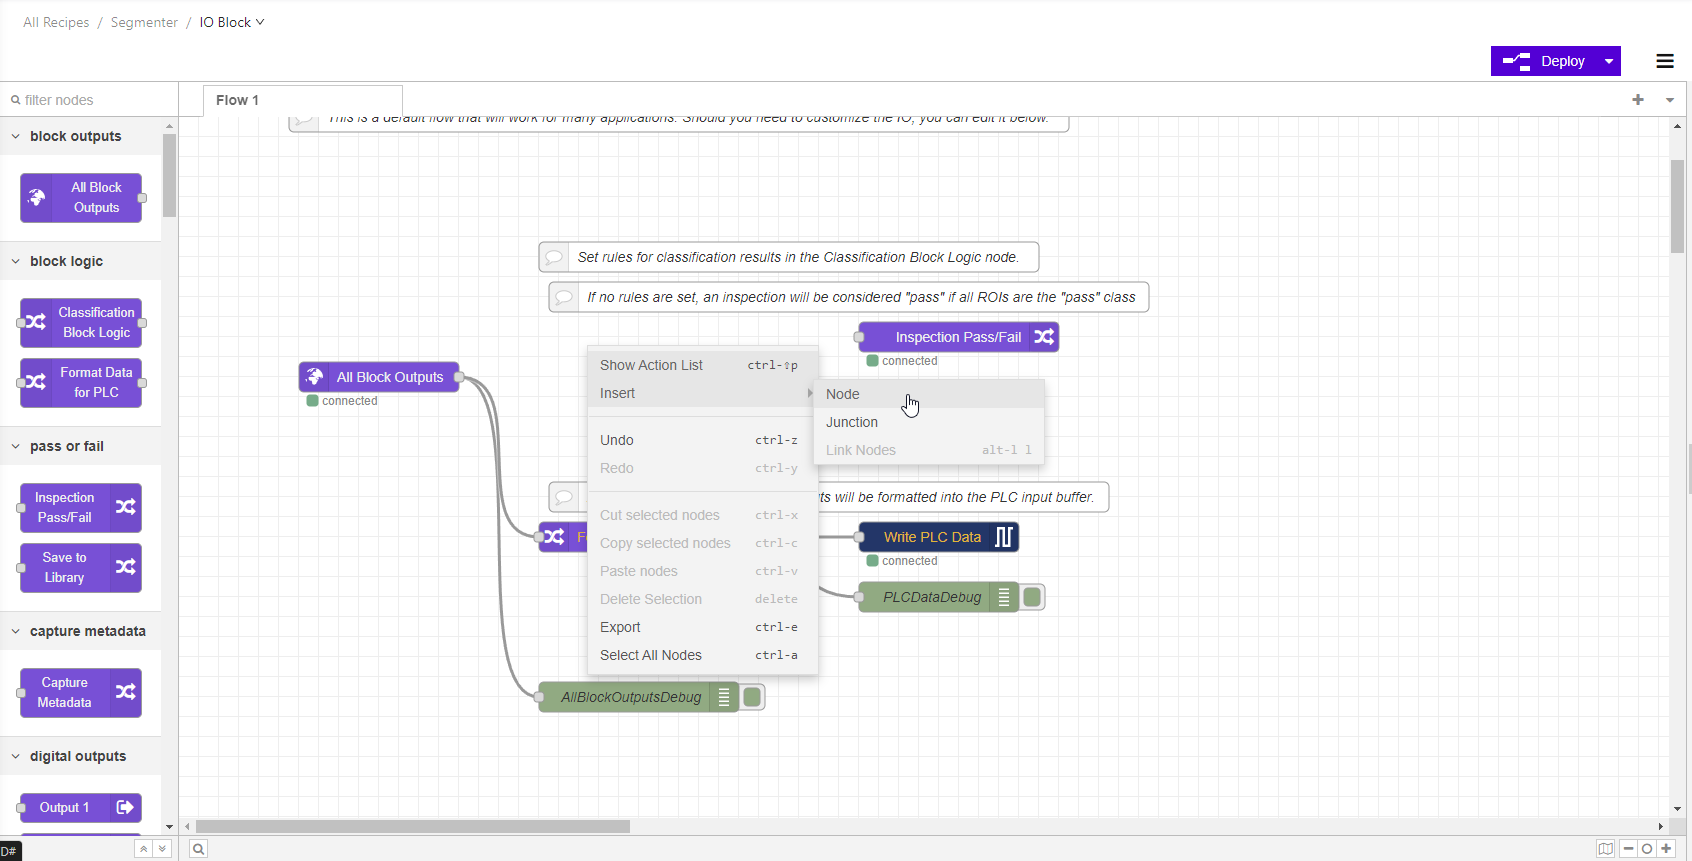
Right-click on the Classification Block Logic node and select Delete Selection.
.png)
Right-click and select Insert > Node > Function.

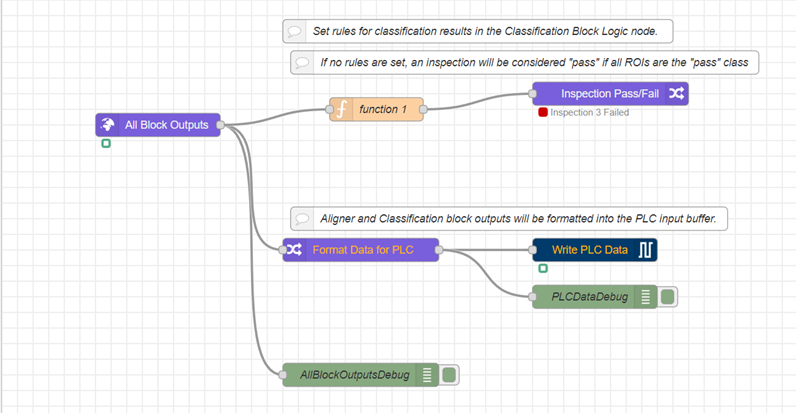
Reconnect the nodes.

Double-click on the function 1 node.
Copy and paste the desired example code from the code samples below into the On Message tab.
Code sample: Pass if no pixels are detected
Copy and paste the following logic:
Code sample: Pass if all blobs detected are smaller than the defined threshold
Copy and paste the following logic:
Code sample: Pass if the total number of pixels detected is less than the defined threshold
Copy and paste the following logic:
Click Done.
Click Deploy.
Note
For more information about the IO Block page, see IO Block and Node-RED Logic.
