Using the Classifier
- 31 Oct 2024
- Print
- PDF
Using the Classifier
- Updated on 31 Oct 2024
- Print
- PDF
Article summary
Did you find this summary helpful?
Thank you for your feedback!
Note
Download the sample recipe here.
From the All Recipes page, click + New Recipe in the top-right corner.
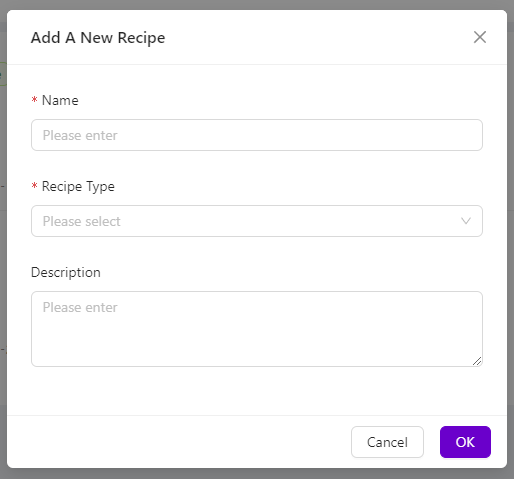
The Add A New Recipe modal will appear. Enter a Name for the Recipe (required) that reflects the specific application you are working on and select Classification from the Recipe Type down-down menu. Click OK to create the new Recipe.
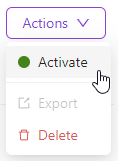
The new Recipe will be listed on the All Recipes page (Inactive). Select Actions > Activate to the right-hand side of the Recipe. Then click Activate to confirm.
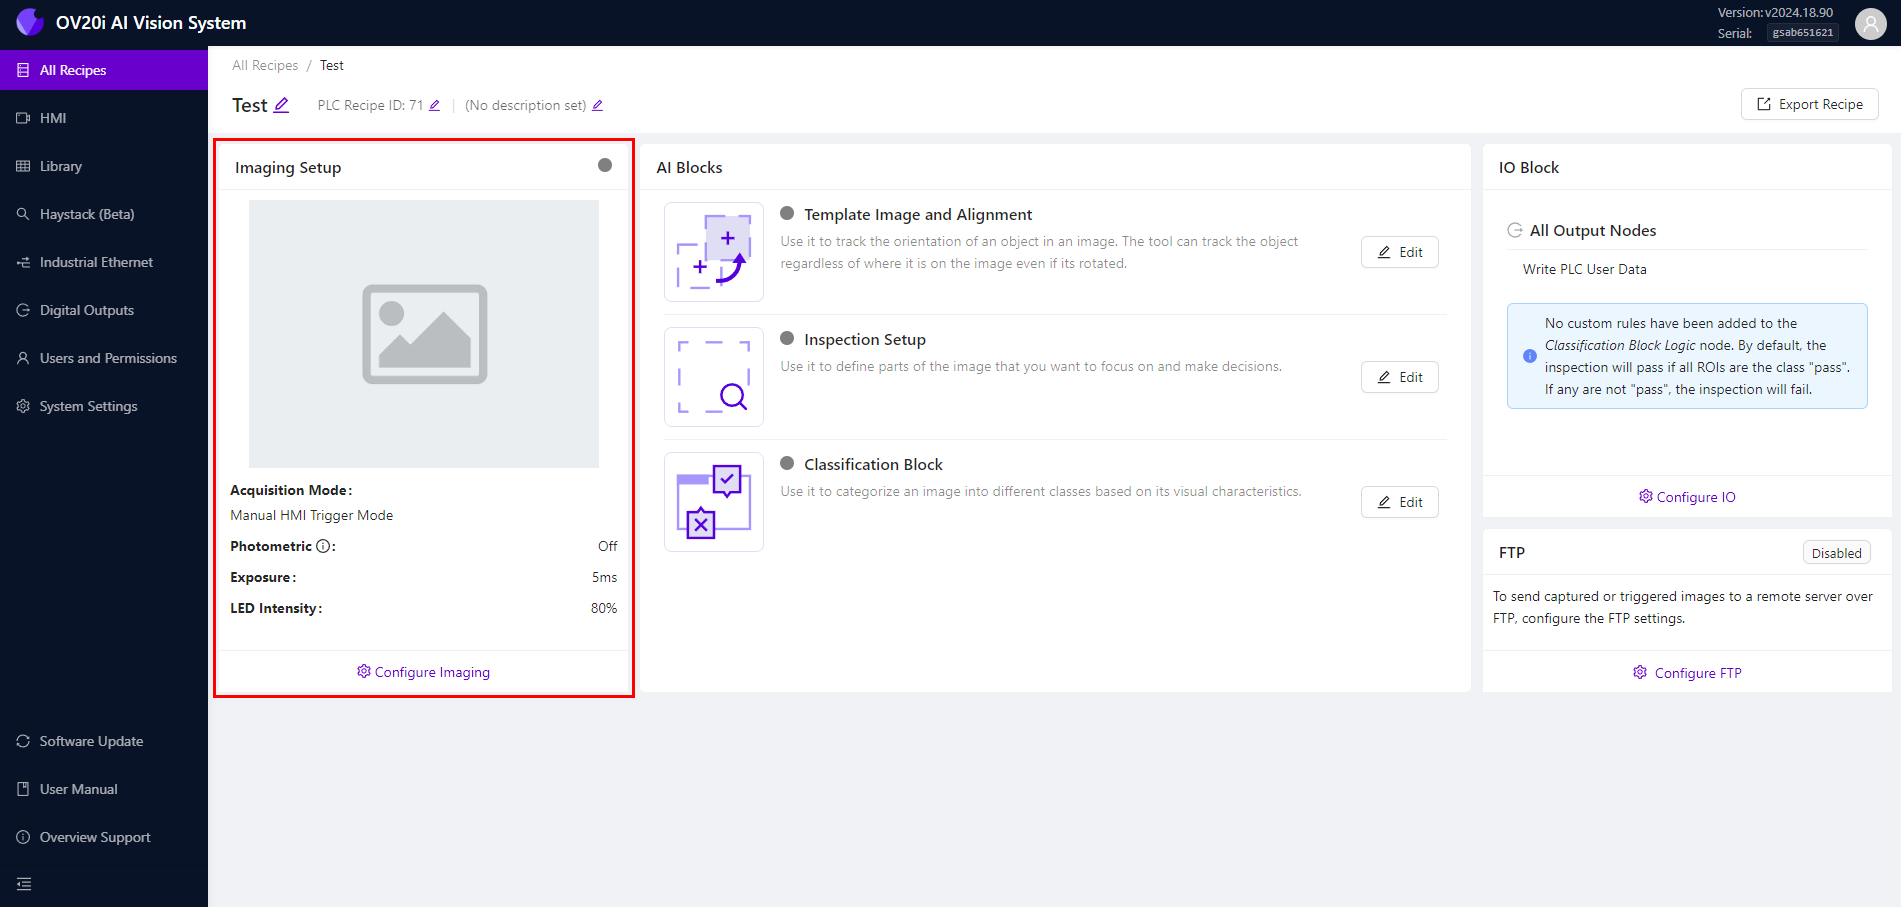
Click Edit to initiate the process of creating your first Classifier model. Then click Open Editor to confirm.
Click Configure Imaging at the lower left-hand side of the page to begin setting up your OV20i camera for this application.
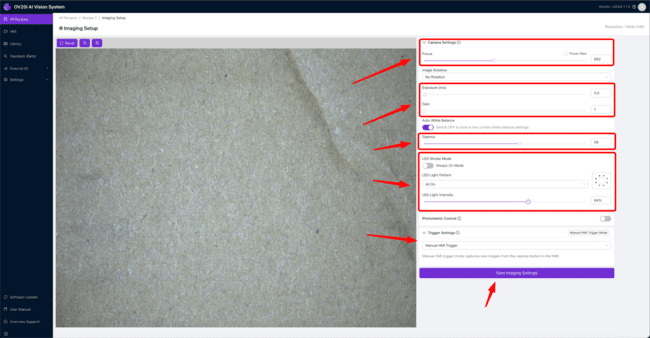
When setting up the camera, it's essential to take the time to configure all of the camera settings correctly. This includes focusing the camera on the region of interest, which is the specific area of the image that contains the object or feature you want to analyze. You can adjust the Focus using the slider or enter the value manually.
Another critical camera setting to get right is the Exposure, which controls how much light enters the camera. You can adjust the Exposure using the slider or enter the value manually.
Optimizing lighting conditions is also crucial for obtaining accurate and reliable results. You need to make sure that the lighting conditions are appropriate for the type of analysis you want to perform. For example, if you're analyzing a reflective surface, you may need to use the lighting to avoid glare or reflections. This can be selected under the LED Light Pattern. In addition to these camera settings, you can configure in-house designed lights for the camera and obtain various patterns to identify defects that may be visible under different reflective conditions.
Getting the Gamma just right is also important. Gamma is a measure of the contrast between the light and dark areas of an image. Adjusting the Gamma correctly can help you see more detail in the image and make it easier to identify defects or features of interest.
Once all of these settings are configured, simply hit Save Imaging Settings to apply them and start using the camera for your analysis.
Next, navigate to Template Image and Alignment.
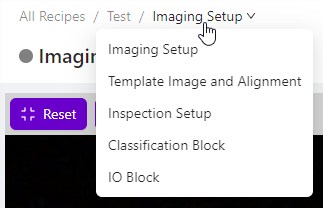
Navigation Tip
Click on the Recipe Name in the breadcrumb menu to return to the Recipe Editor or use the drop-down menu to select Template Image and Alignment.
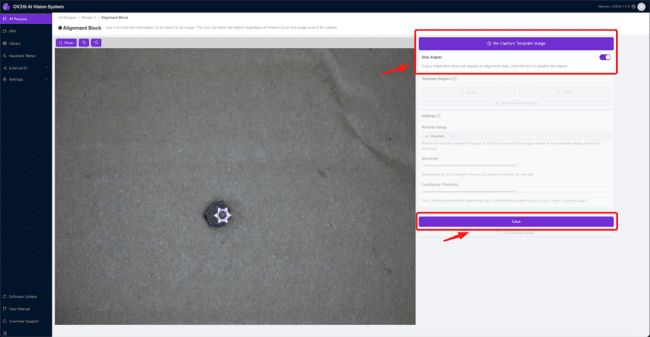
Once you are on the Template Image and Alignment page, you can capture a template image and align the page to your desired condition. However, since you don't require this step for your current task, select Skip Aligner. Once you have made any necessary adjustments, simply click Save to apply the changes and move on to the next step.
Next, navigate to Inspection Setup.
For this particular case, the inspection will be focused on a type of drill bit. However, you can select a different inspection type for your specific use case and adjust the region accordingly.
Once you have selected the appropriate inspection type (class), you can adjust the Region of Interest (ROI) to ensure that the camera is focused on the correct area. This can be done by dragging the corners of the ROI box to adjust its size and position. It's crucial to ensure that the ROI is correctly aligned with the object you want to analyze to obtain the most accurate results.
Once you have adjusted the ROI, simply hit Save to apply the changes and continue with the inspection process.

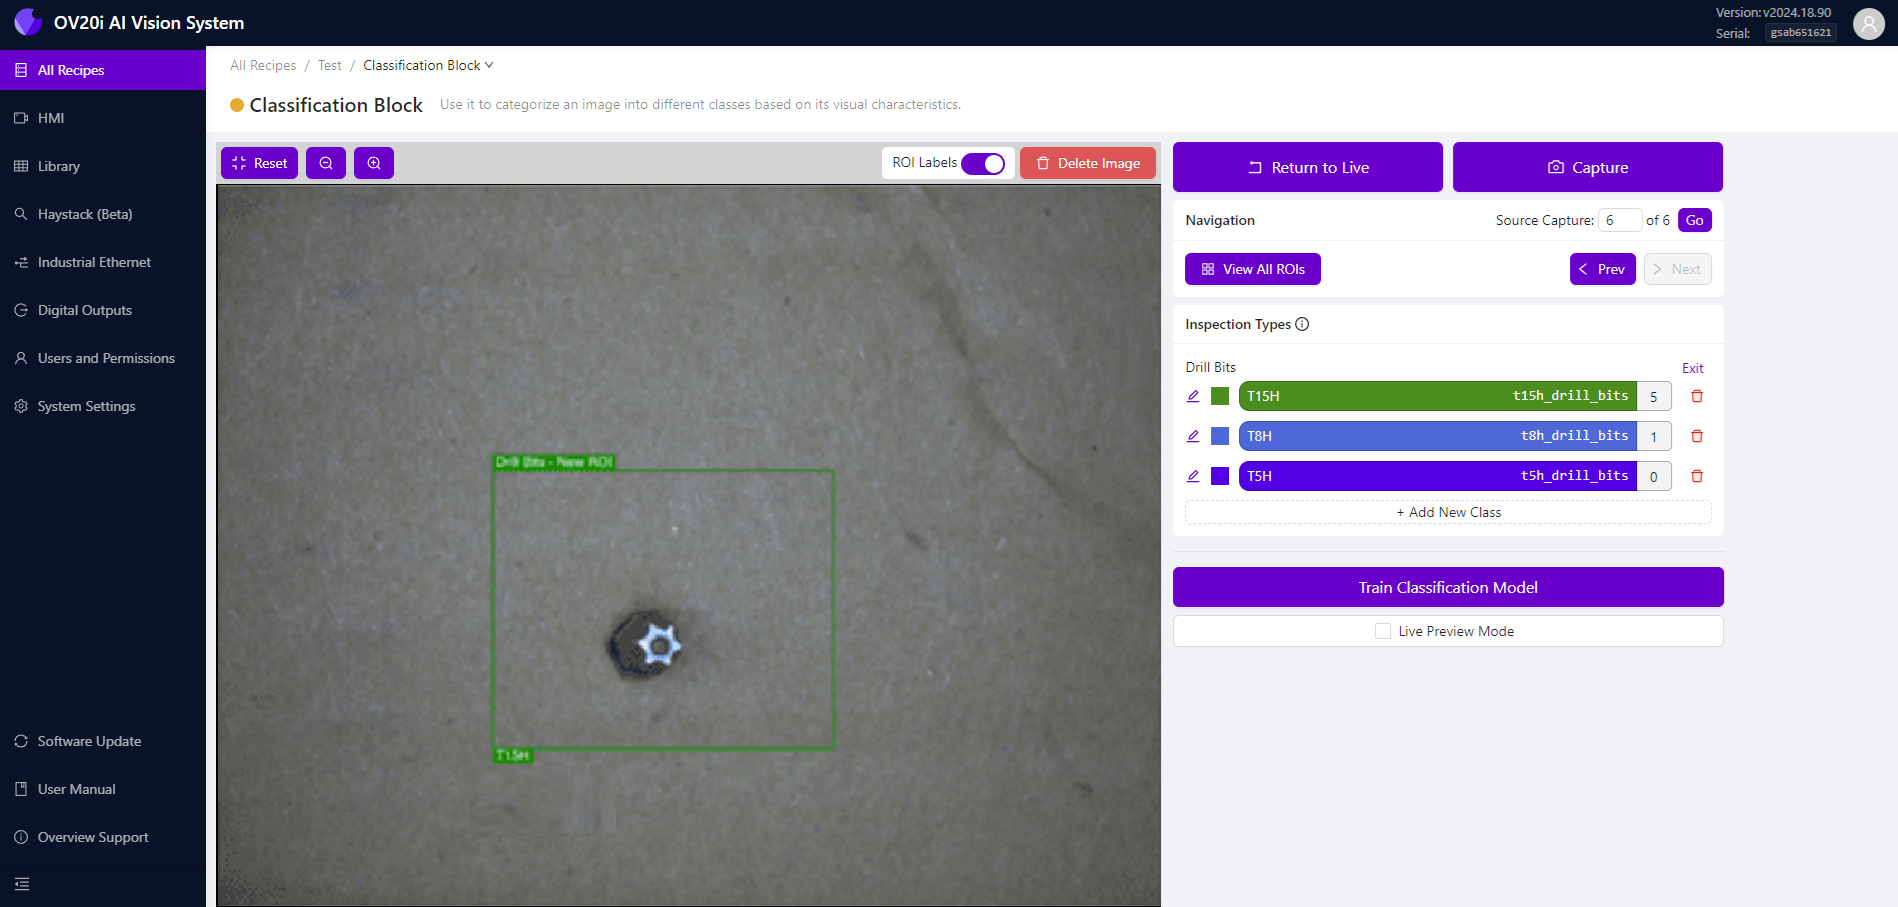
Next, navigate to Classification Block.
In the Classification Block, take a minimum of 5 different images for each type of Class you are performing. In this case, different sizes of drill bits.
Note
The model will be more accurate if ensure each image is different (do not repeat the same image).
Do the same for the second Class.
Do the same for the third Class.
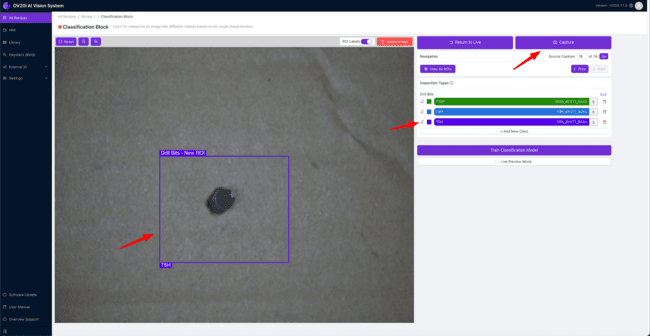
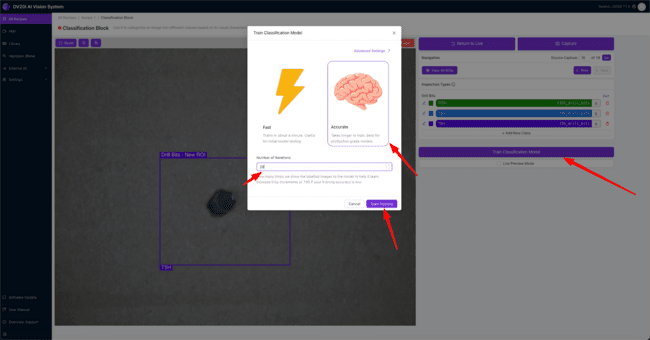
Once all the Classes are labeled under the Inspection Types, it's essential to double-check them to ensure that everything is correctly labeled. Once you've verified everything, click Train Classification Model. This will open a modal where you can choose the type of model you want to train.
The Fast option is great for trial and testing, such as testing out a proof of concept. However, for production use, you will want to use the Accurate option. Keep in mind that the more Iterations you choose to show the model, the better the model's accuracy will be. However, more Iterations will take longer to train the model.
It's important to balance the need for accuracy with the amount of time you have available for training the model. Once you've selected the appropriate settings, hit the Start Training button to begin the training process. The system will start training the model, and you can monitor its progress and make any necessary adjustments as needed.
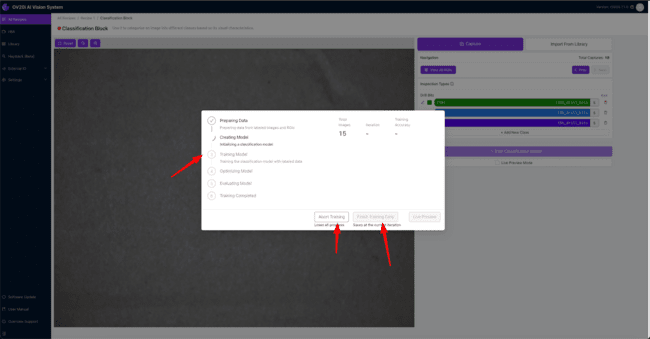
After clicking on the Start Training button, a model training progress modal will be displayed. Here, you can see the current Iteration number and the accuracy value. If you need to stop the training for any reason, click the Abort Training button. If the training accuracy is already sufficient, you can finish the training early by clicking on the Finish Training Early button.
Note
The training will finish automatically if the training accuracy is met.
Once the training is complete, you can check the training accuracy and evaluate the model's performance on the validation data. If you're satisfied with the results, you can save the model and use it for your analysis. If not, you can go back and adjust the settings as needed and retrain the model until you're satisfied with the performance.
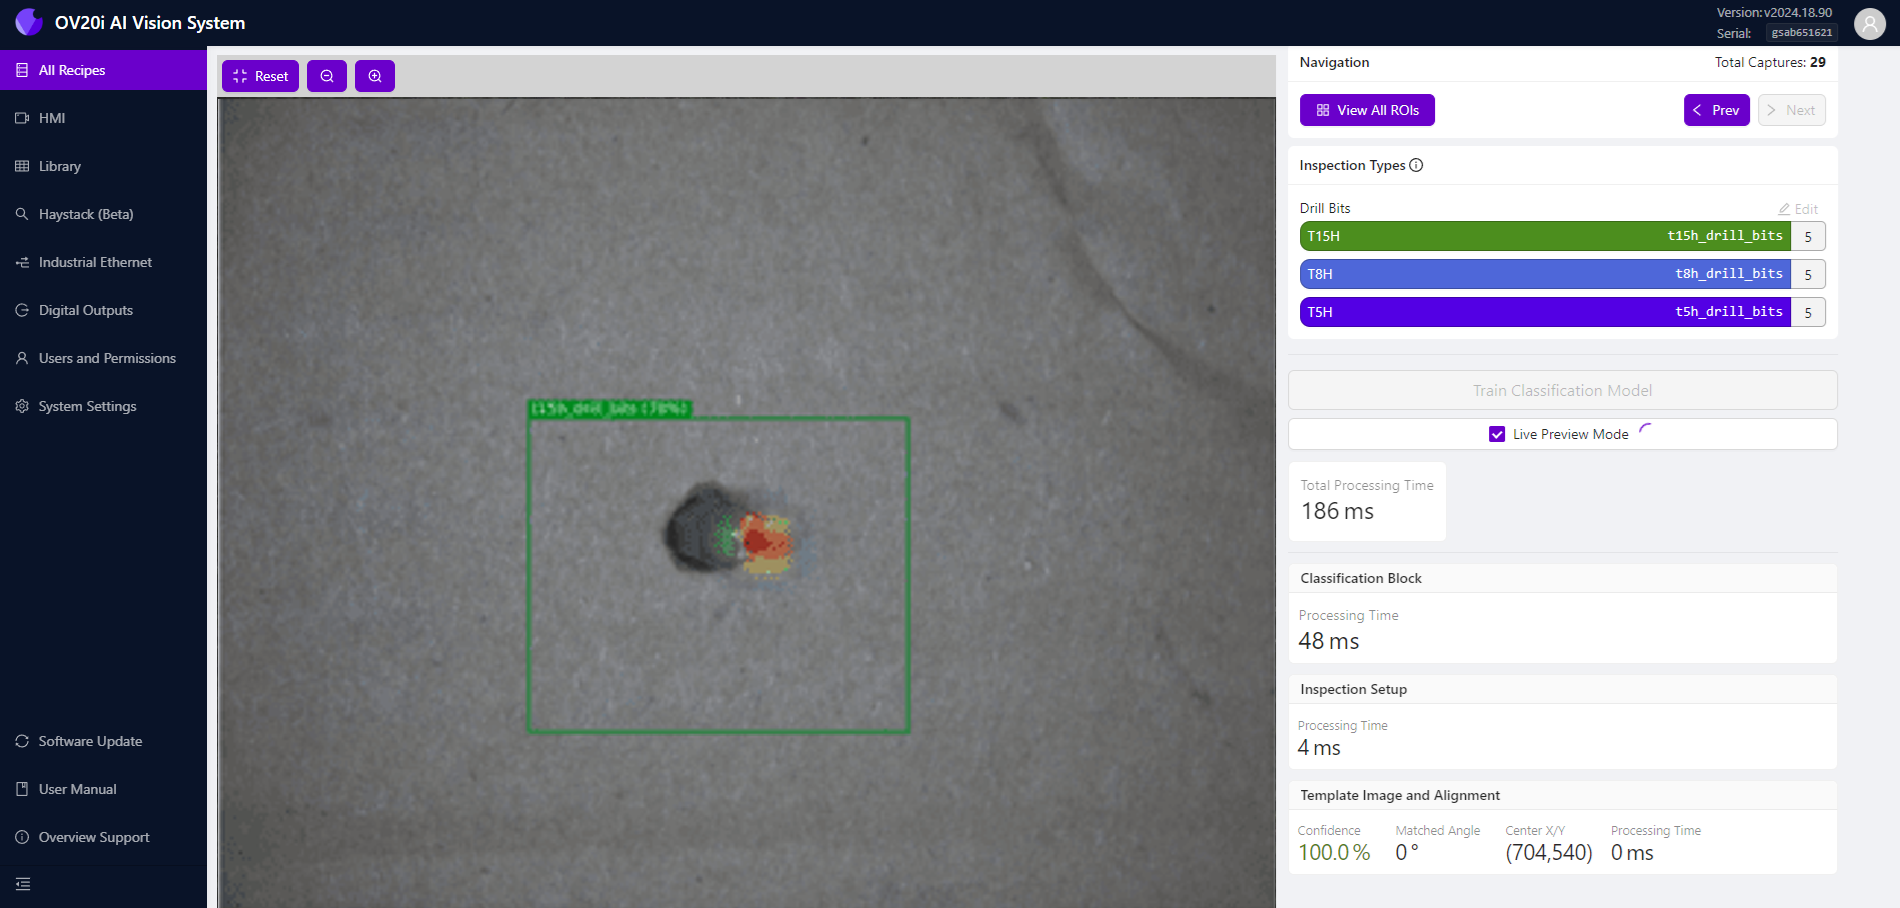
Once the training is completed, click Live Preview to view the live preview of the trained model. Congratulations! You have trained your first classification model.
Configure pass/fail logic
In the steps below, we’ll walk you through configuring pass/fail logic for a classification recipe using Node-RED logic.
Note
Ensure all the AI Blocks are trained (green) before editing the IO Block.
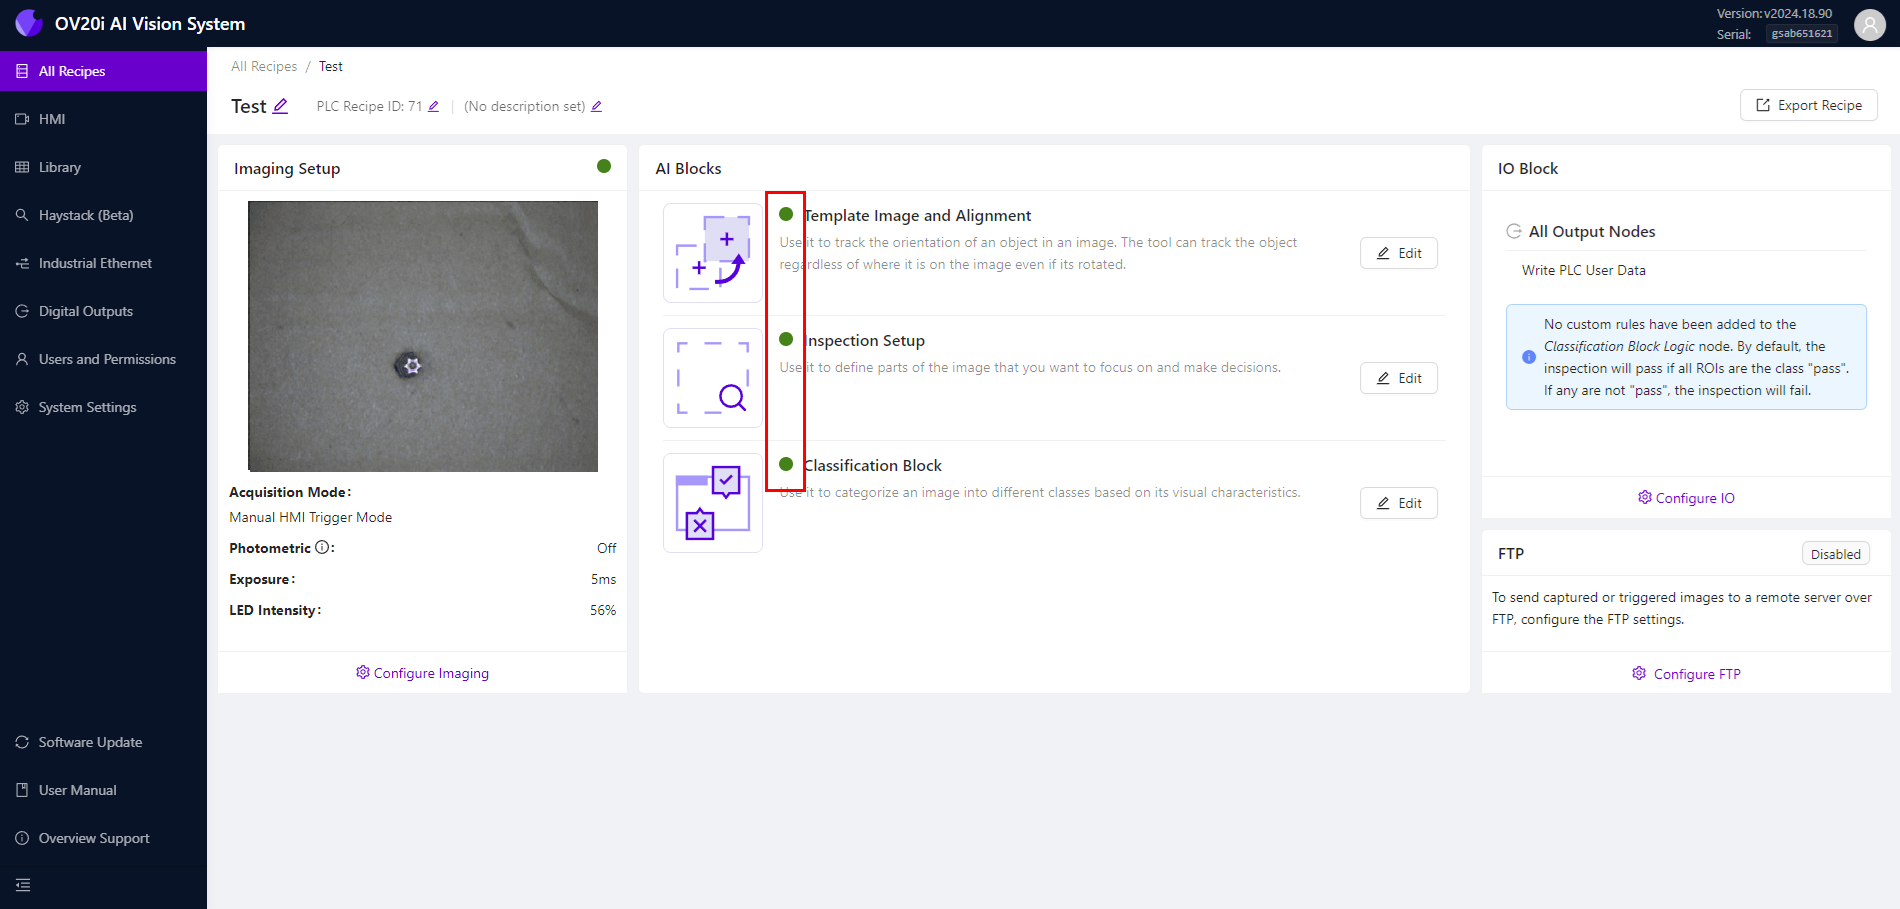
Navigate to IO Block using the breadcrumb menu or select Configure I/O from the Recipe Editor page.
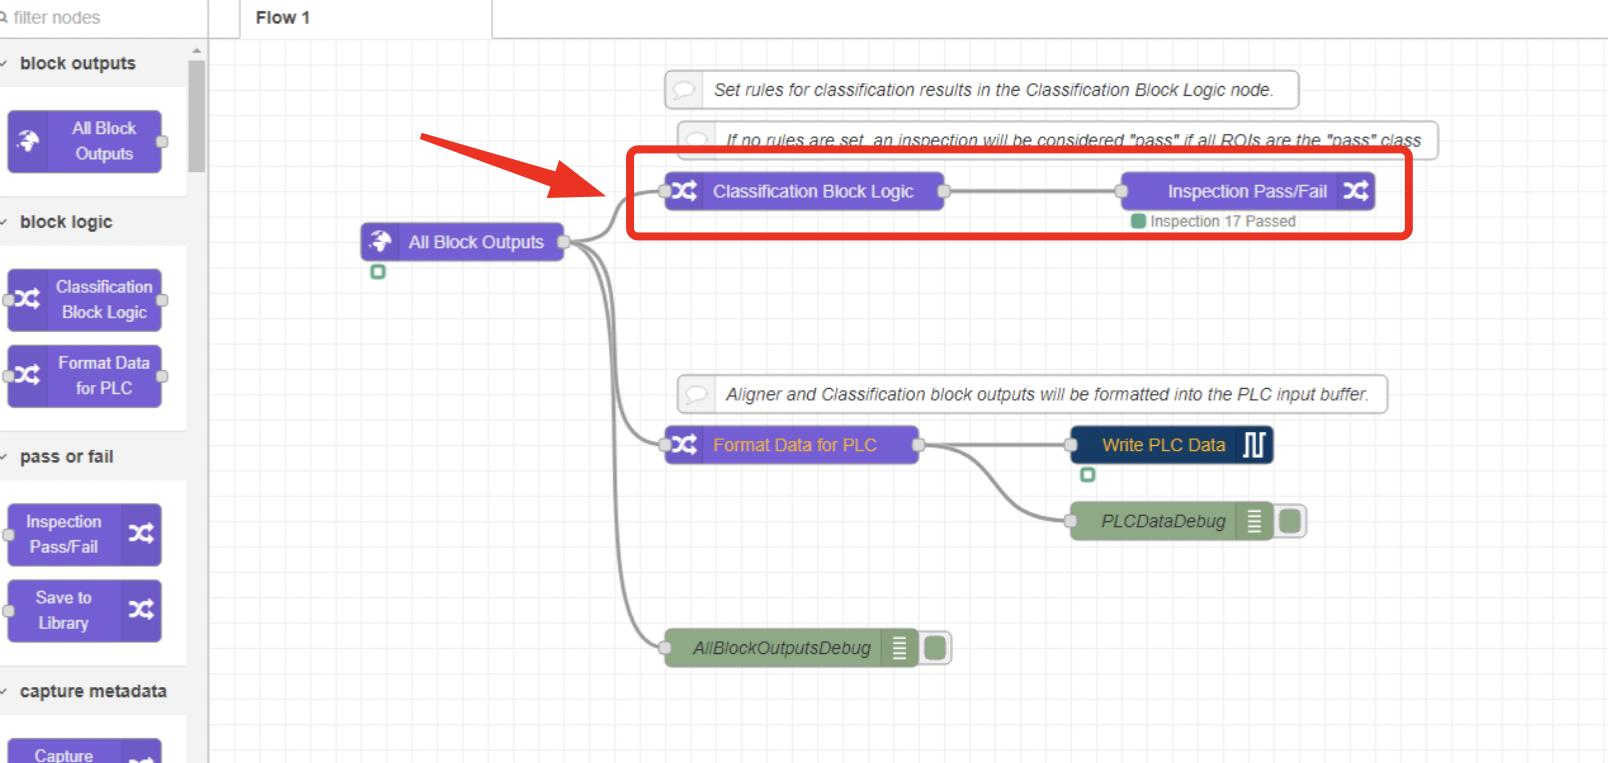
Locate the Classification Block Logic Node in the default flow, or add it to your flow from the nodes menu on the left. All purple nodes in Node-RED represent Overview Logic Blocks. These blocks are integral to the overall classification logic. For a comprehensive understanding of each block, refer to IO Block and Node-RED Logic.
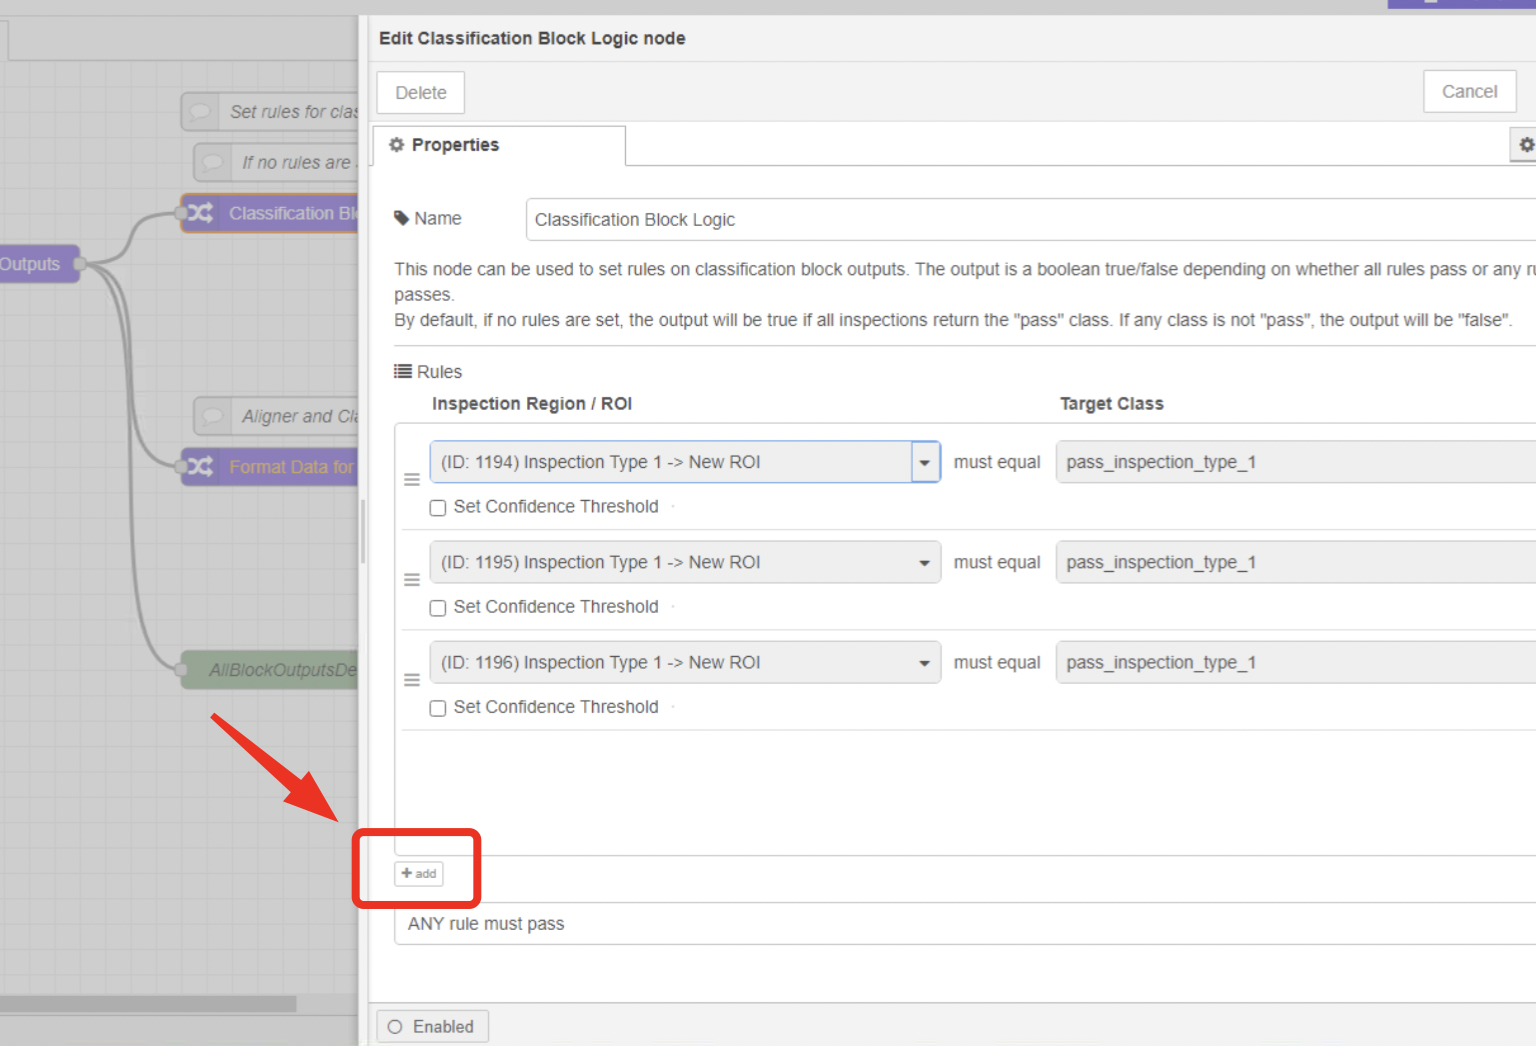
Double-click on the node to edit it. From the Inspection Region / ROI dropdown menu on the left, select the ROI you wish to include in the logic. You can also set a confidence threshold for the inspection. You can use the confidence to tune sensitivity, but generally it is not required.

Select a Target Class that the model should identify. For example, select the corresponding target class if you want the model to pass items with a "pass" classification.
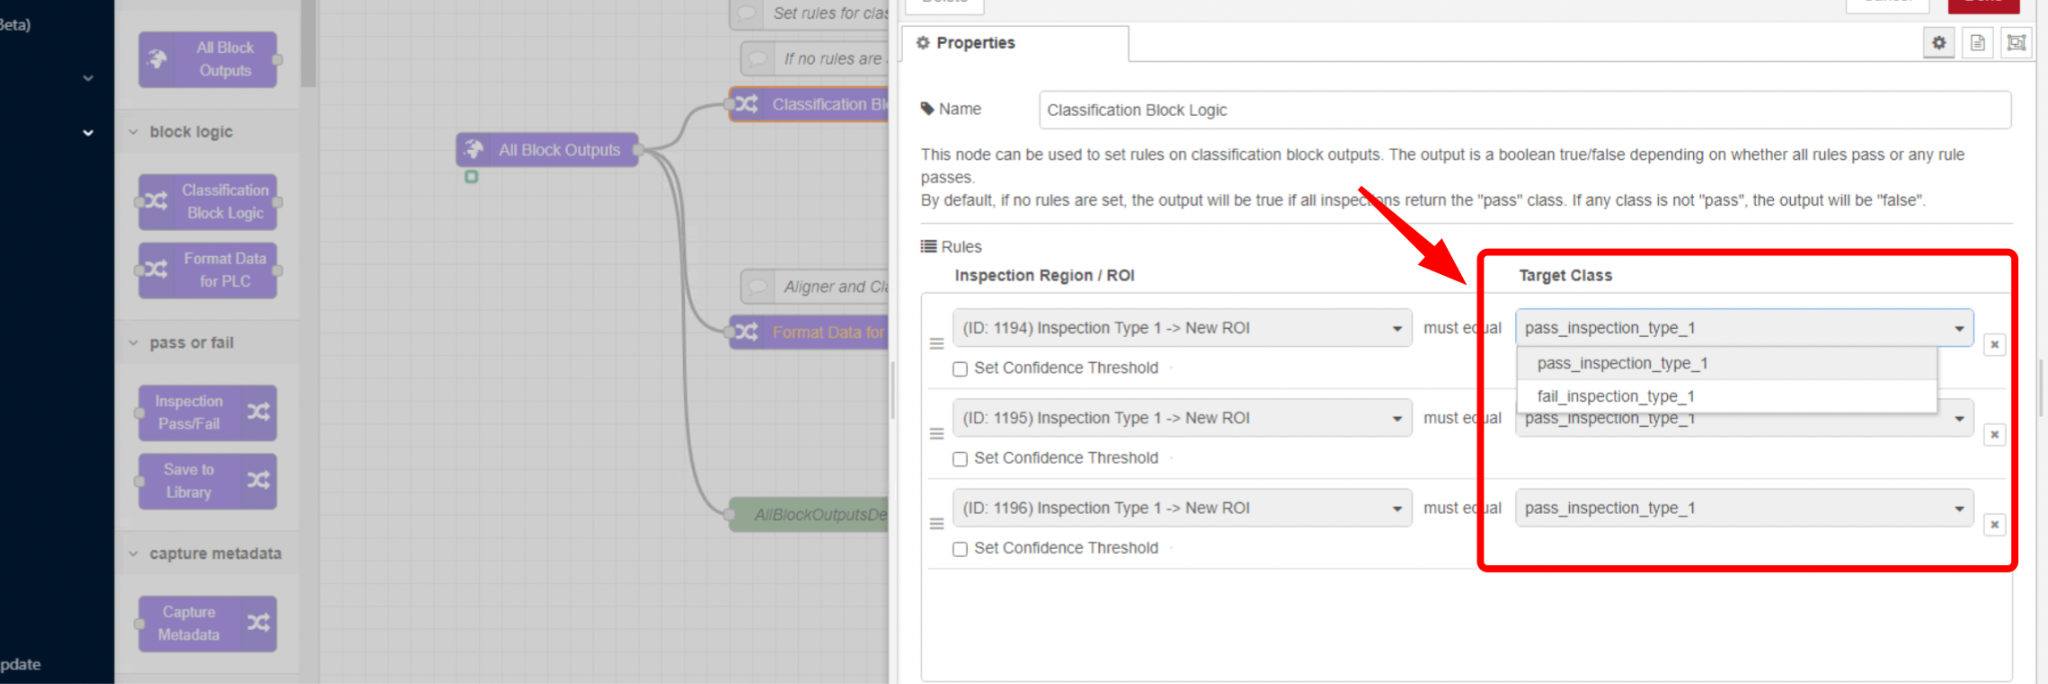
If the model requires additional regions of interest, you can add more ROIs to the logic. Additionally, you can select if any or all of the rules must be true in order for the inspection to pass. By default, all rules must pass.
After configuring all necessary settings, click Done in the top-right corner and then click on Deploy in the top-right corner of the Node-RED editor to save and deploy the logic. Verify that the model operates as expected by testing with sample data from the HMI page.
.png "image(118).png")
Was this article helpful?