Adding data to an existing recipe and retraining
- 21 Oct 2024
- Print
- PDF
Adding data to an existing recipe and retraining
- Updated on 21 Oct 2024
- Print
- PDF
Article summary
Did you find this summary helpful?
Thank you for your feedback!
If images that are not supposed to fail are failing, follow the steps below to add the images to the model and retrain.
Connect to the camera (see Connecting to OV20i Software for help).
Ensure the Recipe you want to retrain is Active.
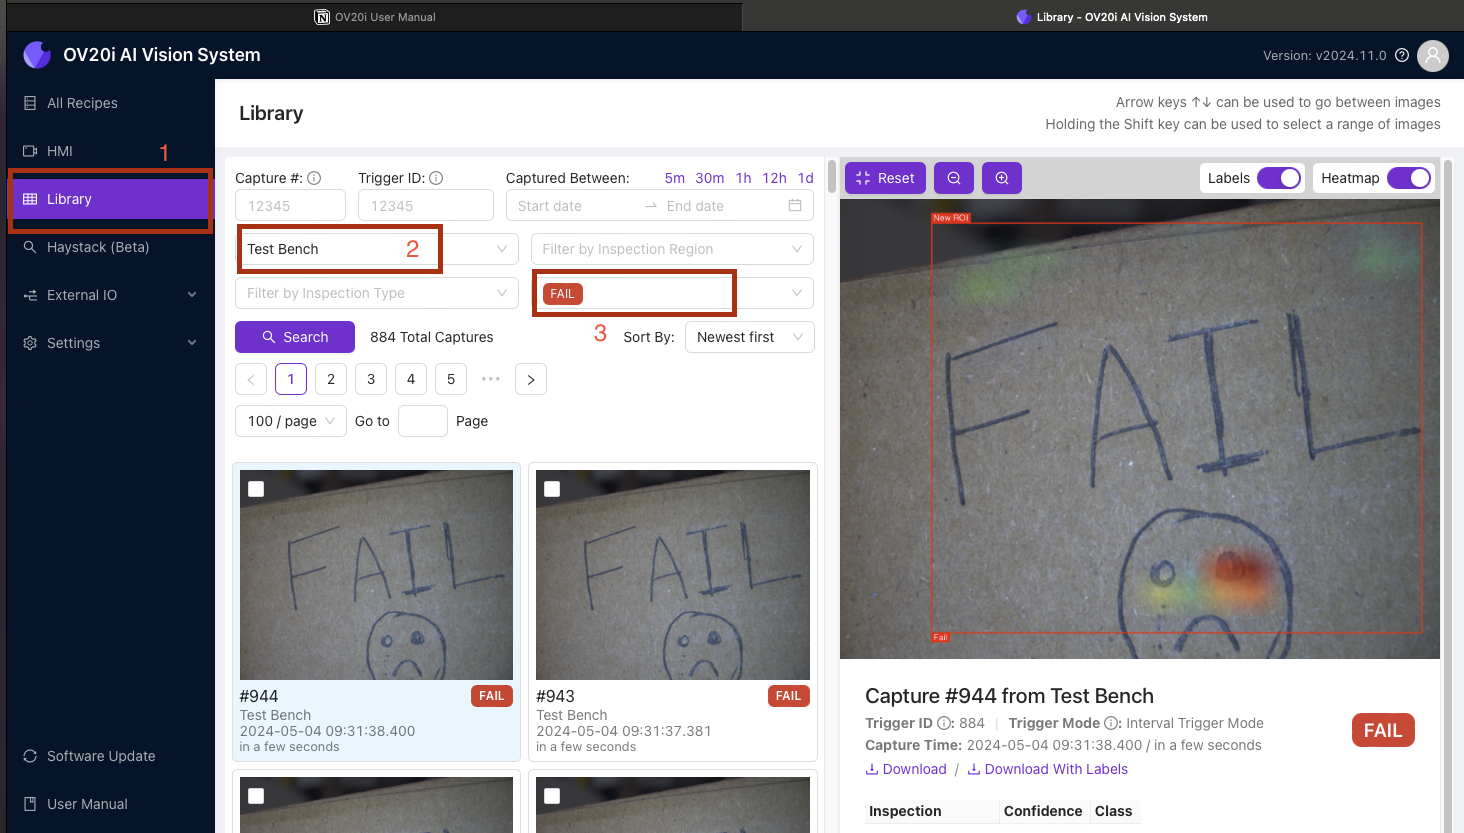
Navigate to the Library. Use the filters and click Search find the images you want to use to retrain the model.
Tip
Use the Filter by Recipe field to select the Recipe the images were captured with and Filter by Pass / Fail field to select FAIL to only view the failed images. You can further organize the images by using the Sort By option. Click Search to view the results.
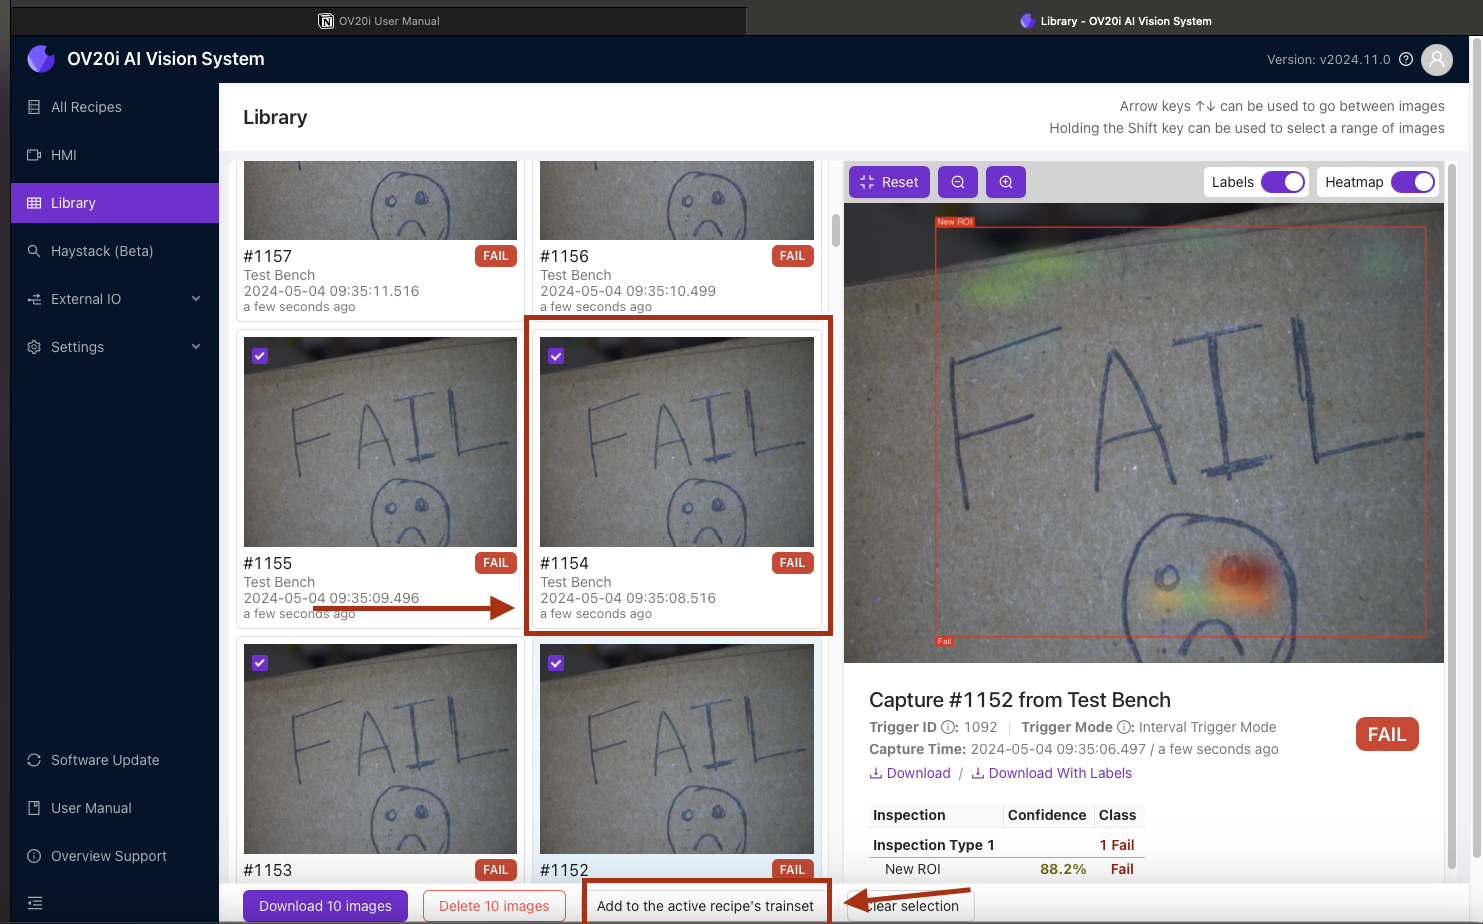
Select each image you want to use to retrain the model. Then click Add to the active recipe’s trainset at the bottom of the screen. This will add the selected images to the active recipe's trainset, which will help improve the accuracy of your model. Once you have added the selected images to the trainset, you can continue to train your model and test it on new data to see if the accuracy has improved.
Warning
It's important to only add images that are not supposed to fail to your trainset, as adding failed images can negatively impact the performance of your model.
A success message in the top-right corner will confirm the selected images have been added to the trainset. Click Go to recipe editor to make any adjustments and train the model.

From the Recipe Editor page, go to Classification Block / Label And Train (depending on whether this is a Classification or Segmentation Recipe) then click View All ROIs.
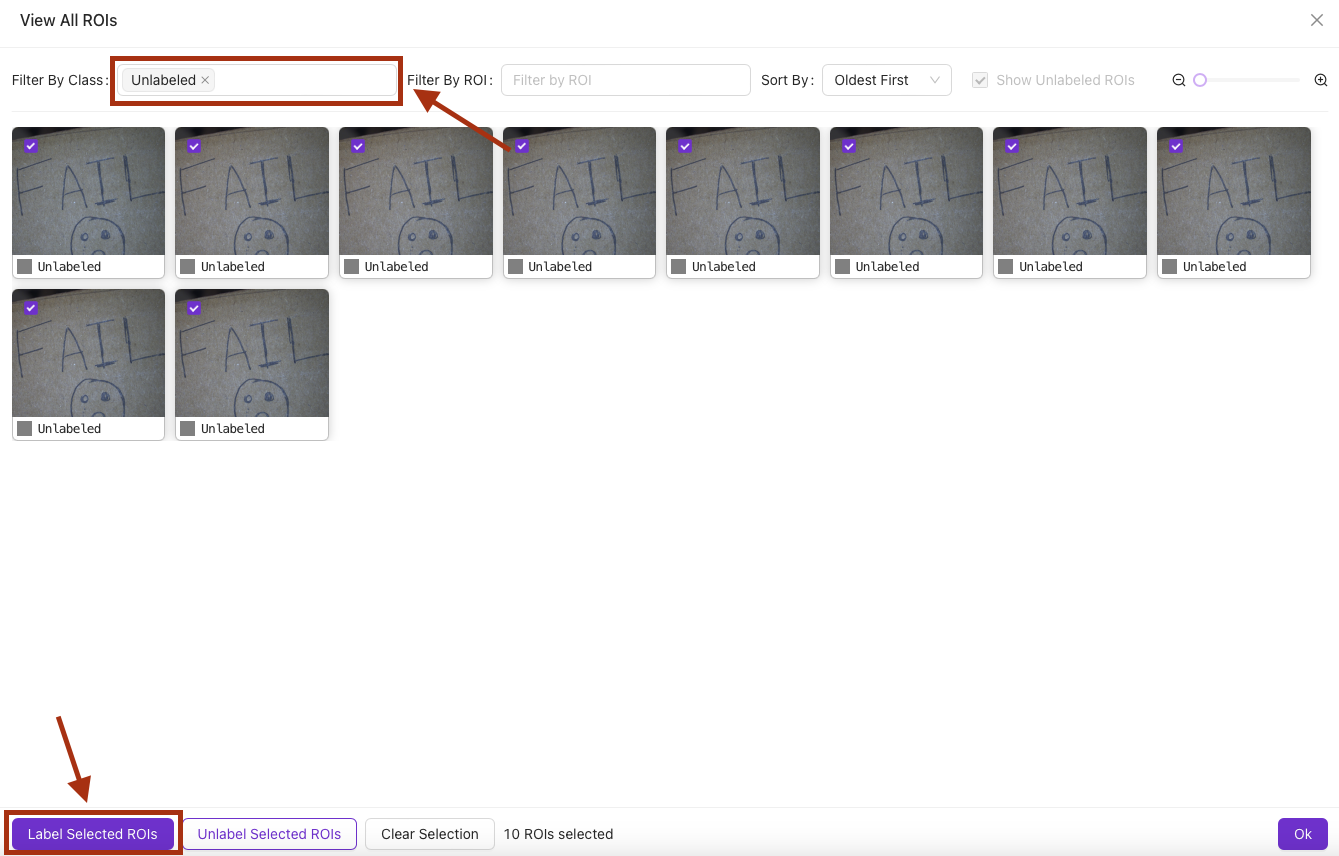
Use the Filter By Class filter and select Unlabeled to filter the images. This will display all the images in the recipe that have not been labeled yet. Once you have the list of unlabeled images, select all the images that you added to the trainset in the earlier step. Once selected, click Label Selected ROIs in the bottom-left corner.
Warning
Take care when using the bulk labeling tool to avoid accidentally mislabeling data. Click Clear Selection at the bottom of the page every time you re-label. If you fail to do so, the images might move over but remain selected, which can lead to incorrect re-labeling.
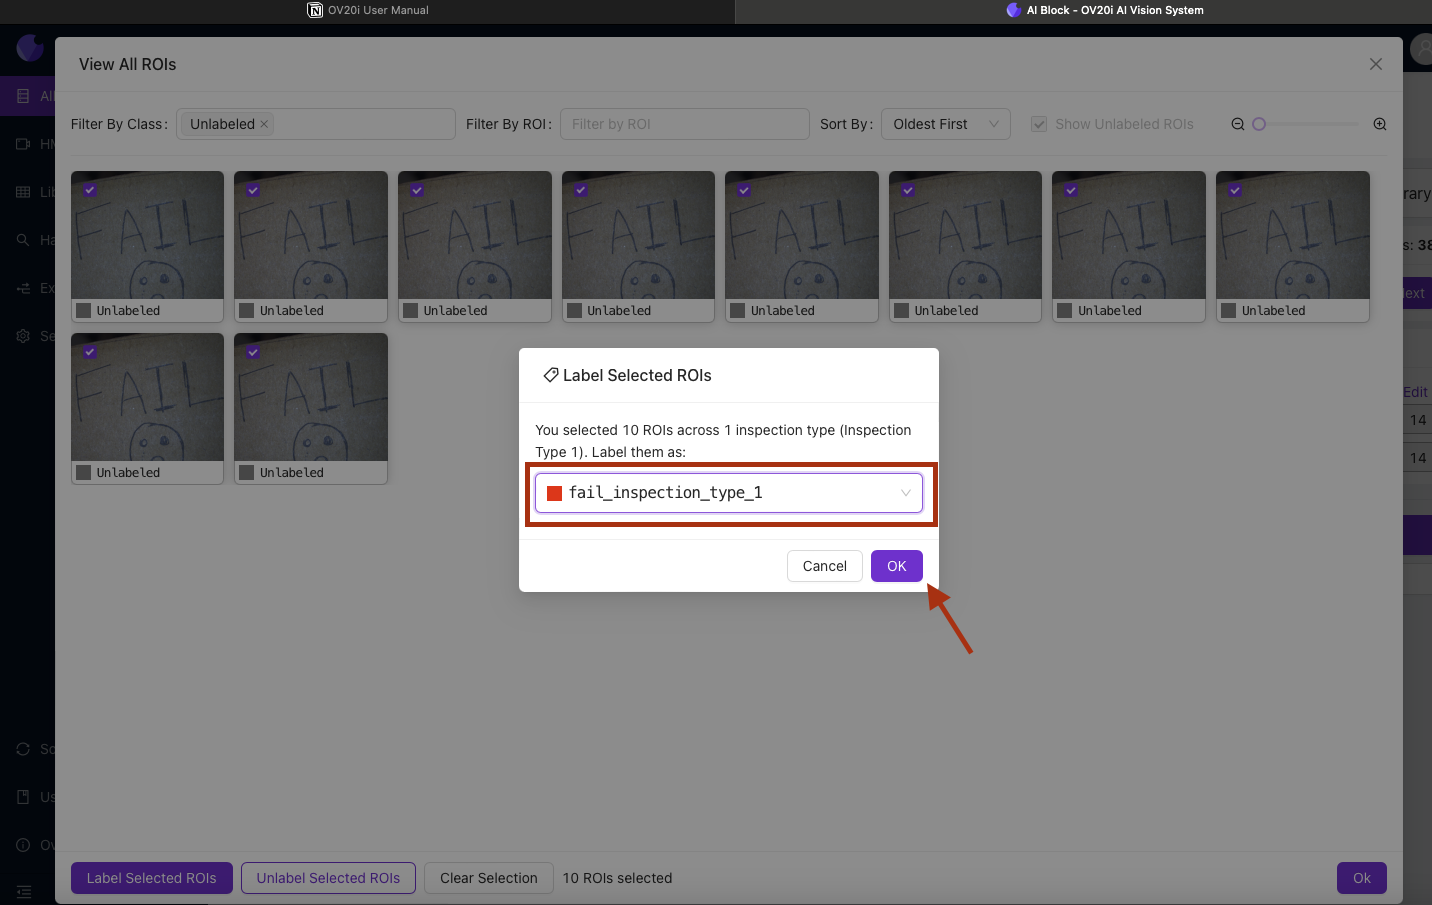
A modal will appear where you can label the selected ROIs (Regions of Interest) in the images. Select the appropriate label for the selected ROIs from the drop-down menu and click OK to apply the label to all the selected ROIs in all the selected images. This will help you organize your data and train your model more effectively.
Close the View All ROIs modal to return to the Classification Block / Label And Train page.
Click Train Classification Model / Train Segmentation Model and retain the model. The model will learn from the labeled data and adjust its algorithms to improve the accuracy of its predictions. Once the training process is complete, you can test the accuracy of the model by feeding it new data and observing its predictions using the Live Preview Mode or HMI page. If the accuracy is not satisfactory, you can repeat the training process with additional data or adjust the model parameters to improve its performance.
Was this article helpful?